What is the difference between Tare and Zero?
Zero and Tare are useful functions for simplifying the measurement process, but they serve different purposes:
- Zero is used to reset the sensor to zero when no load or input is applied.
- Tare is used to remove an unwanted offset caused by external influences on the sensor.

What is Zero?
Although Zero may appear similar to Tare, it serves a different purpose. The Zero function should only be used when no load is applied but the sensor does not read zero. It performs a permanent offset correction.
To determine the Zero value, the system calculates an average over 1 second, which is then subtracted from all subsequent measurements. The Zero value is stored permanently in the module (including after power cycles) and is only cleared by reconfiguring the variable or executing a zero reset.
What is Tare?
In most cases, Tare is the appropriate function to use. It is typically applied to remove an offset caused by installation or external influences on the sensor.
With the Tare function, the current measurement value at the moment the command is executed is subtracted from all subsequent measurements. The Tare value is stored temporarily and is cleared after a power cycle of the controller. It is only stored permanently in the module if the “Tare save non-volatile” option is enabled in the configuration.
Using Tare and Zero
The tare and zero function can be activated in 3 ways: via host software (i.e., GI.bench), based on a variable's value, or a digital input state change.
Tare/Zero on host (GI.bench)
-
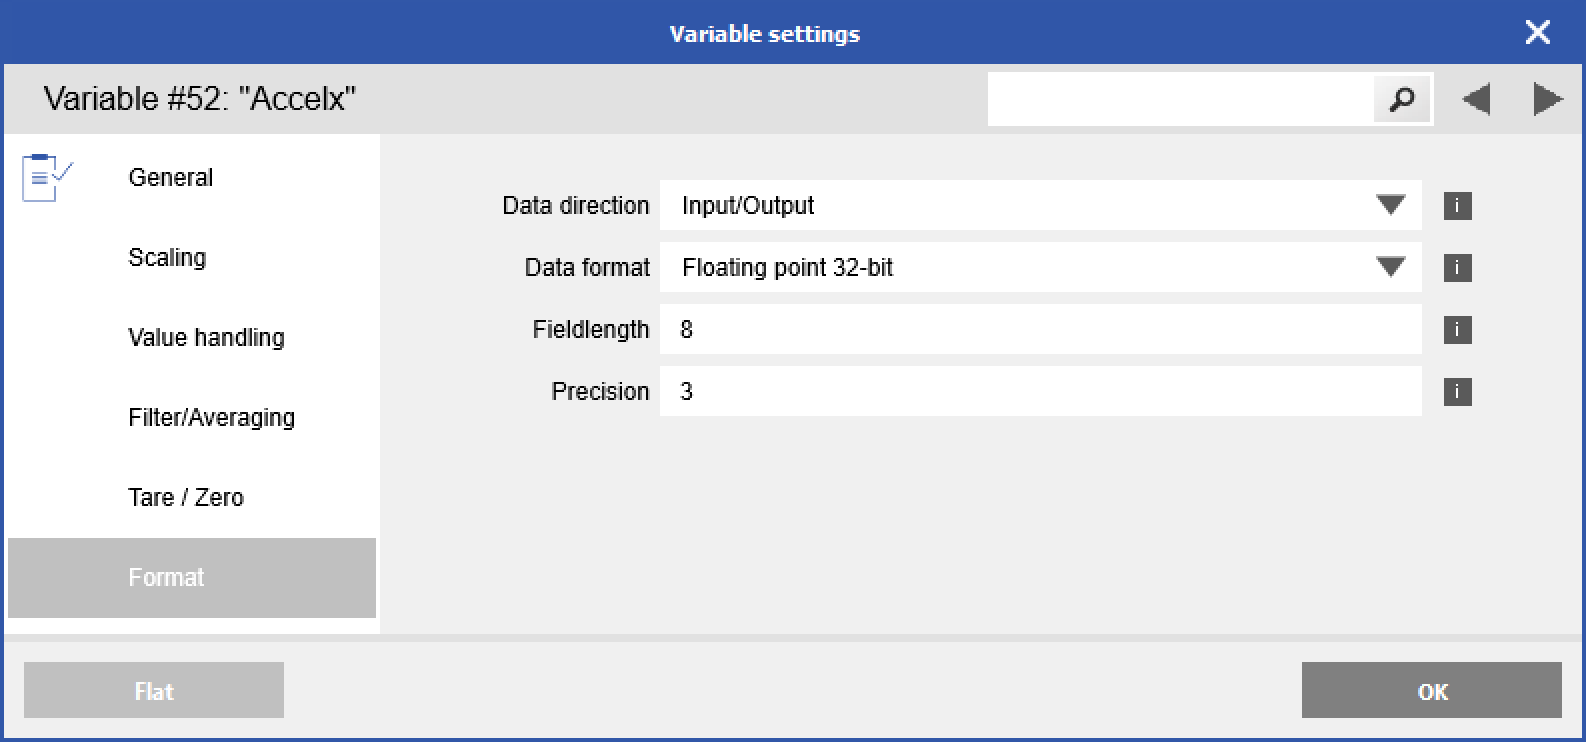
In GI.bench, double-click a variable to open the Variable settings window > go to the Format section.
-
Change the Data direction to Input/Output. Click OK when done.
-
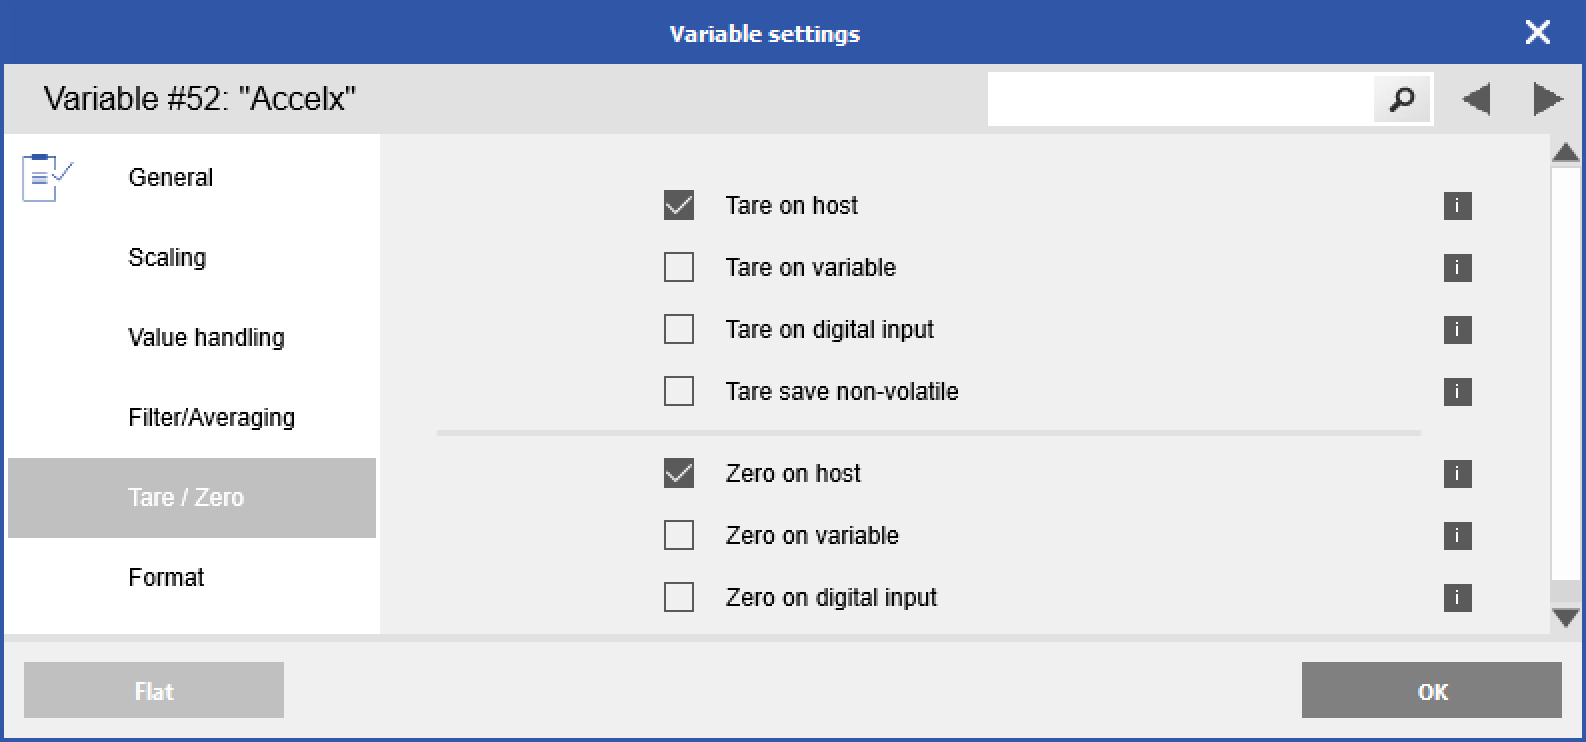
Navigate to the Tare/Zero section > check the box for Zero on host or Tare on host.
-
Write the configuration to the controller.
-
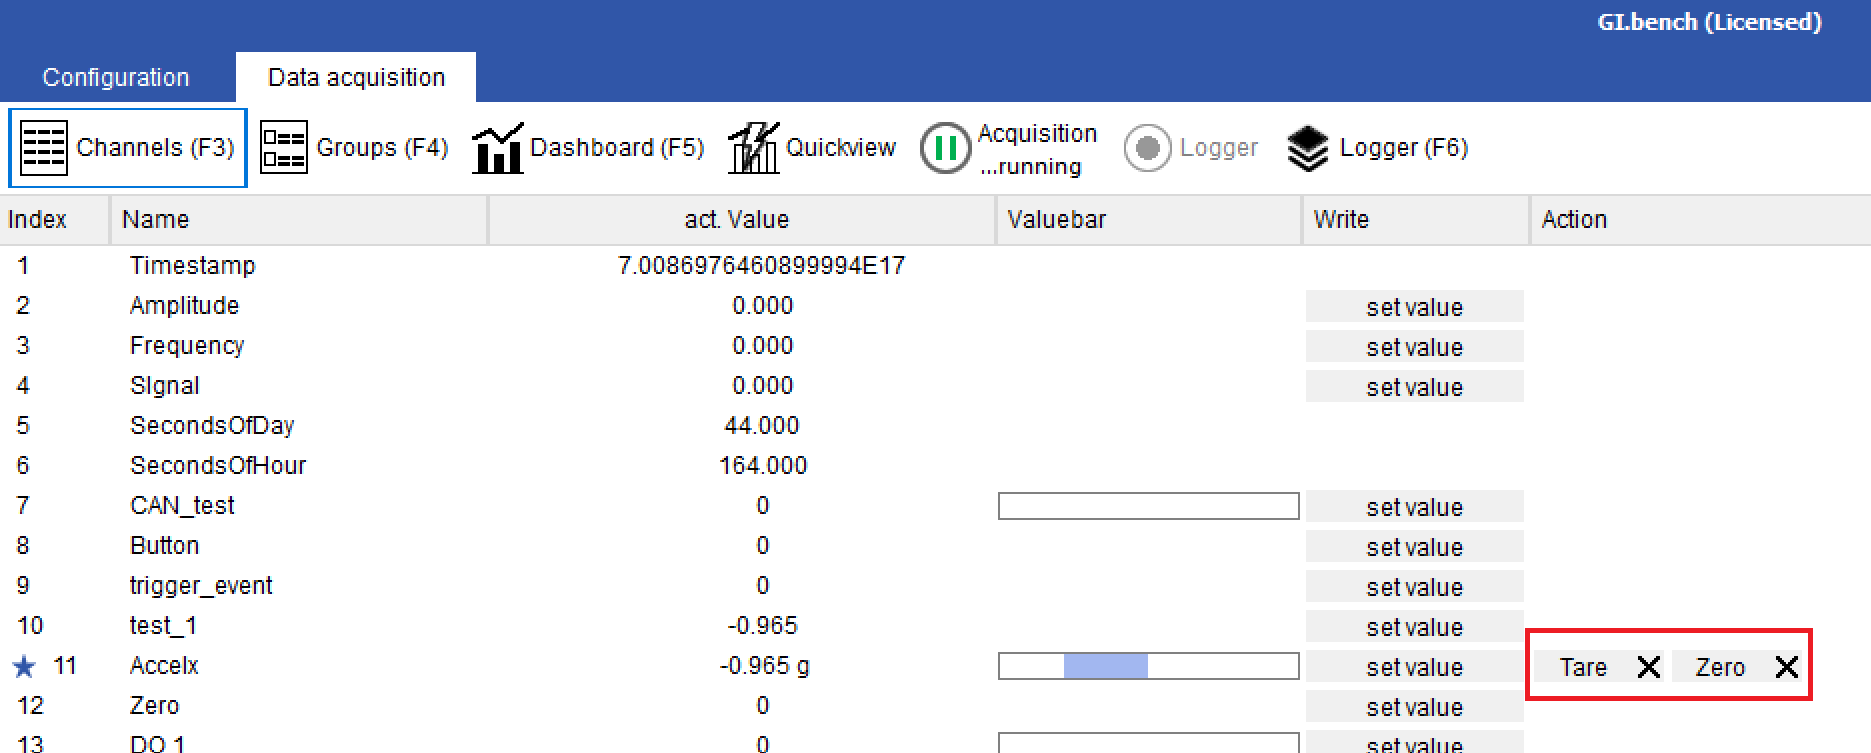
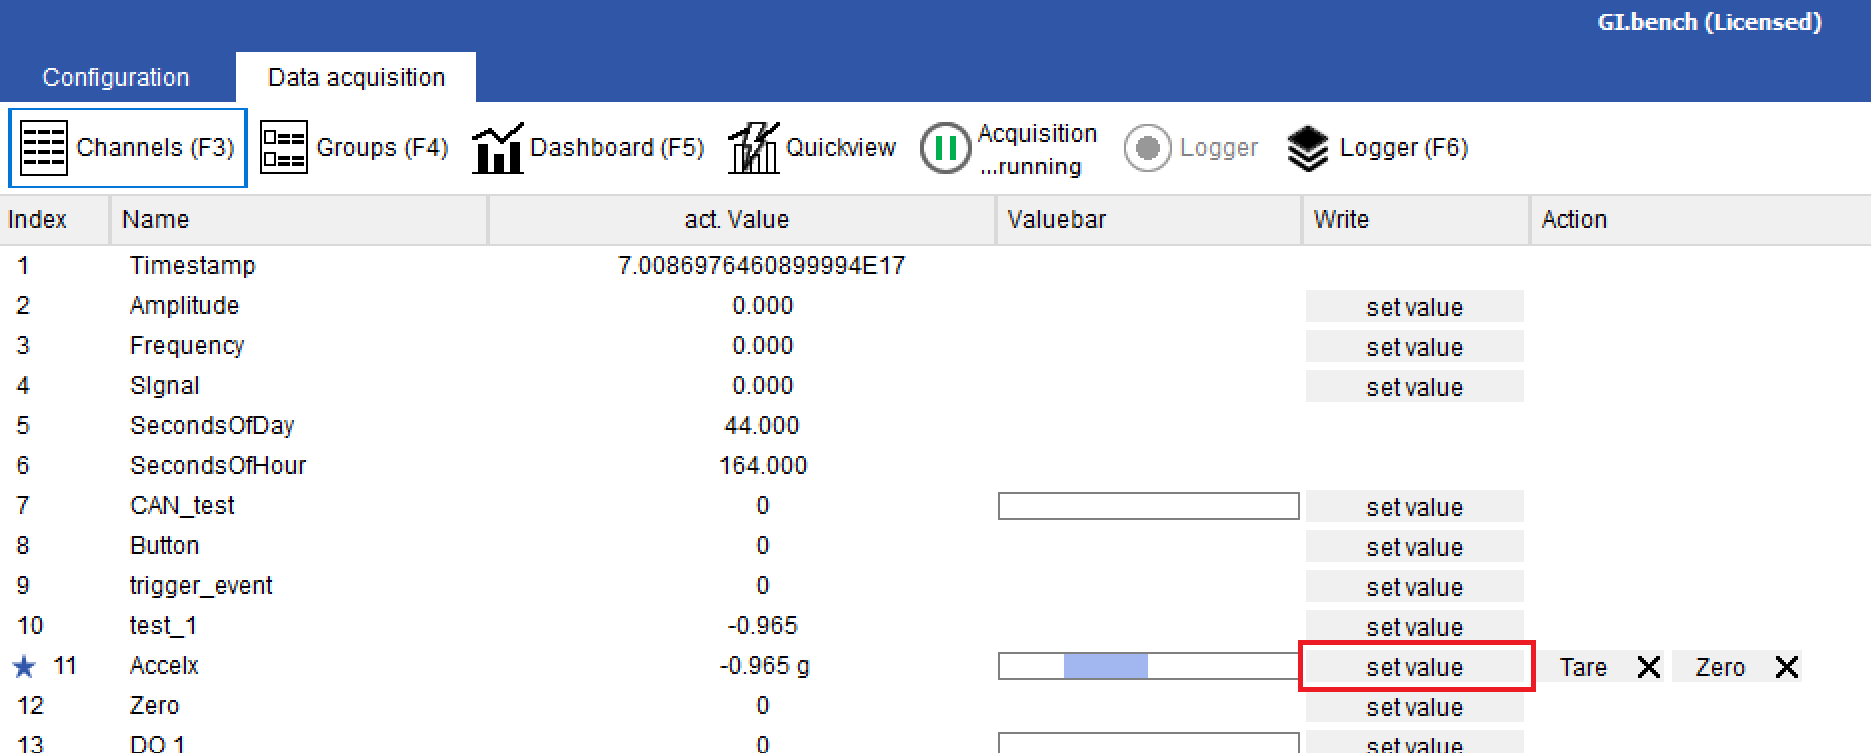
Go to the Channels (F3) section in the Data Acquisition tab. You should now see the Zero and/or Tare button in the Action column. Click to activate the corresponding function.
Tare/Zero on variable
-
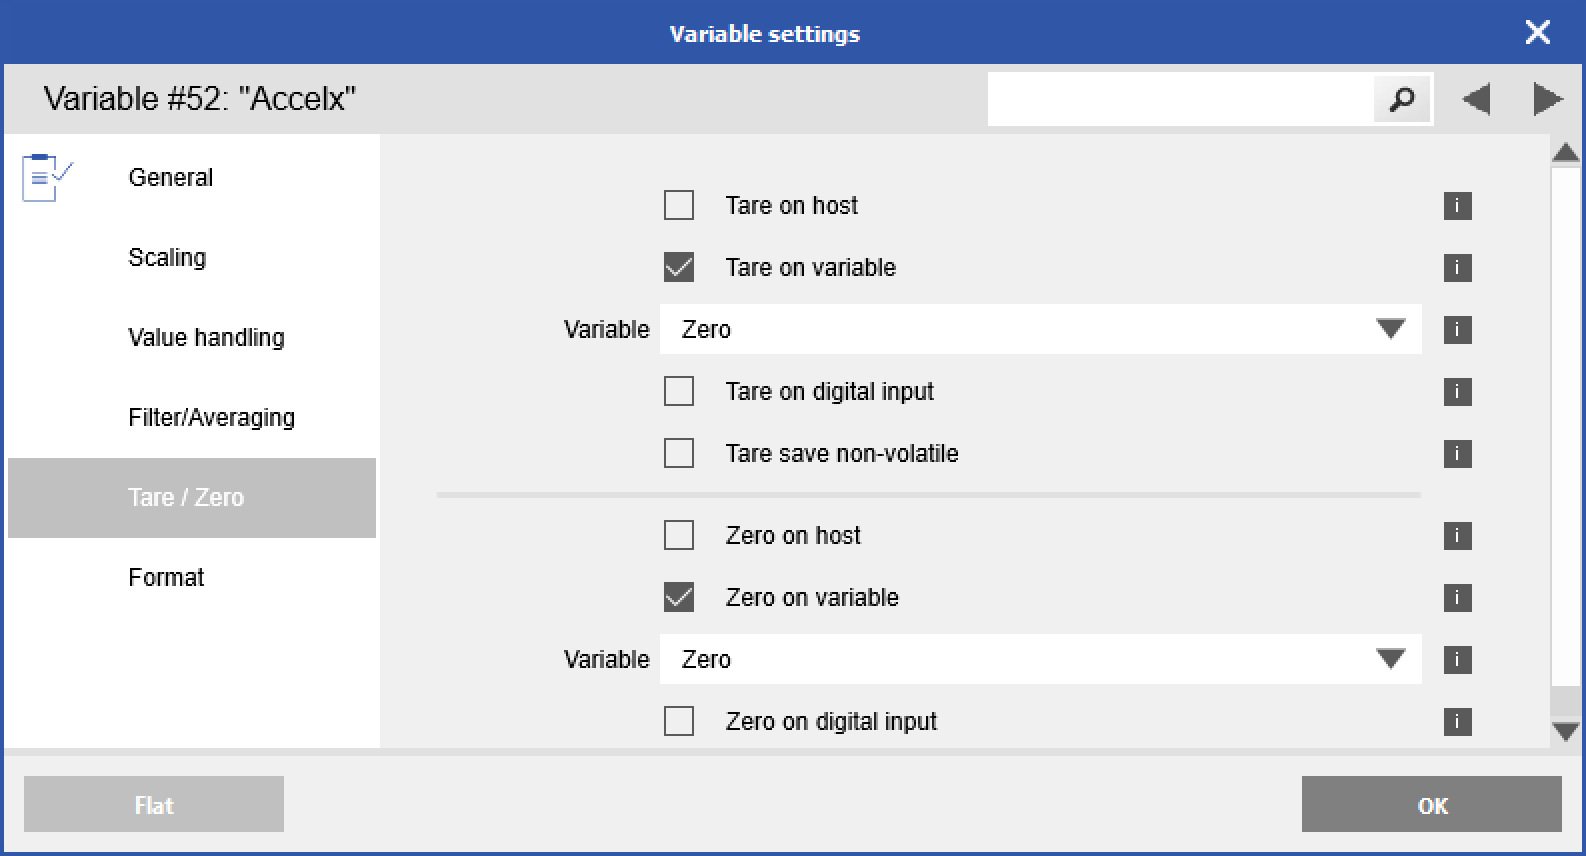
In GI.bench, navigate to the Tare/Zero section > check the box for Zero on variable or Tare on variable.
-
An additional field will appear underneath to select a reference variable. Select the variable that will be used to activate the desired operation. Click OK when done. Please note that only variables on the same I/O module can be selected.
-
Double-click the reference variable to open the Variable settings window > go to the Format section.
-
Change the Data direction to Input/Output. Click OK when done.
-
Write the configuration to the controller.
-
Go to the Channels (F3) section in the Data Acquisition tab. You should now see a set value button in the Write column for the reference value
- The set value button will allow you to change the value of this reference variable to the appropriate code to initiate the desired operation.
Code
Function
1
Perform tare
2
Reset tare (clear stored tare value)
4
Perform zero
8
Reset zero (clear stored zero value)
256
Add this option if you want to apply zero or tare only to the first input (X series only)
512
Add this option if you want to apply Zero or Tare only to the second input (X series only)
1024
Add this option if you want to apply Zero or Tare only to the third input (X series only)
2048
Add this option if you want to apply Zero or Tare only to the fourth input (X series only).
Tare/Zero on digital input
The process is the same as Zero/Tare on variable, except you check the box for Zero on digital input or Tare on digital input, and then select the desired digital input variable. A digital input going from Low to High will initiate the operation. There is no possibility to initiate a reset of the Zero/Tare value.
Zeroing or taring via a digital input is only supported on modules with an integrated digital input. Using other digital inputs within the system for this function is currently not supported.