Use Q.station firmware v2.17.1 or later to ensure compatibility with the latest SMB 3 network file-sharing protocol.
Establishing a shared folder on a PC
-
Create the folder where the data files will be saved, for example, C:\Data.
-
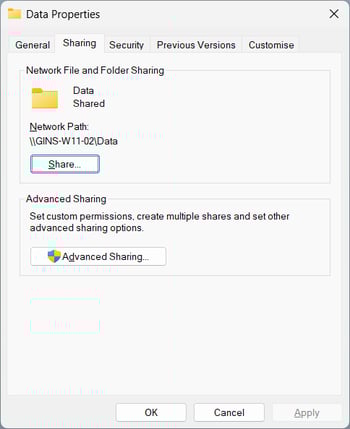
Right-click on the folder and select Properties. Click on the Sharing tab and choose Advanced Sharing...
-
Enable Share this folder and click on Permissions at the bottom.

-
Check Full Control, Change and Read in the Allow column.

[For Windows 10 only] Enable SMB:
-
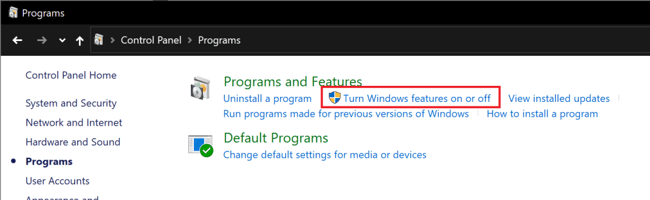
Open the Windows control panel.
-
Navigate to Programs > Programs and Features > Turn Windows features on or off.
-
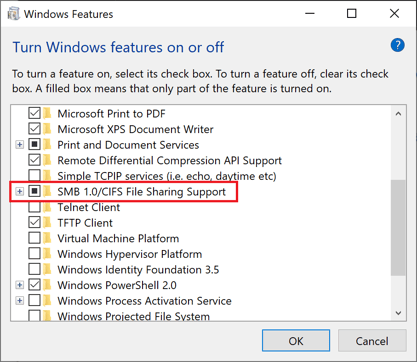
Check the box for SMB 1.0/CIFS File Sharing Support.
Set up the logger on the controller
-
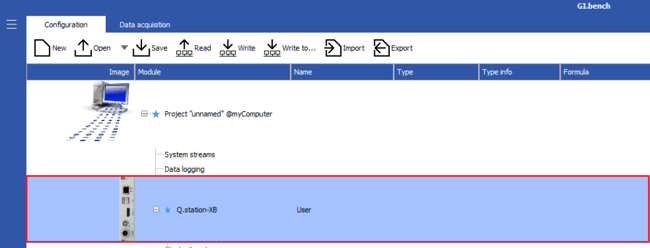
In GI.bench, the Read button loads your controller into the project configuration tree.

-
Once the controller is loaded, double-click the controller in the tree to open the Controller settings dialog.
-
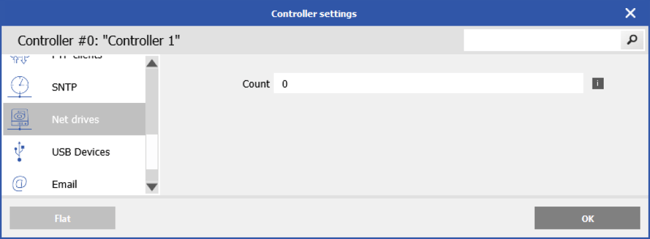
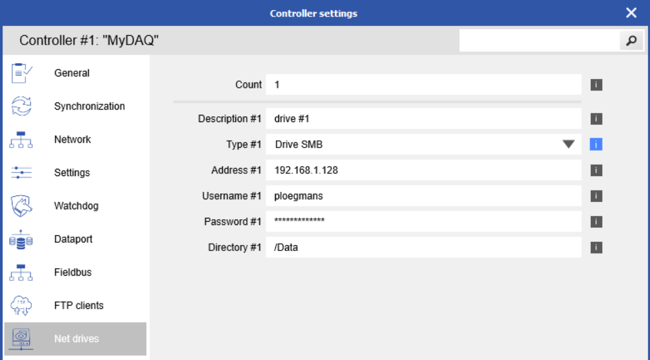
Navigate to the Net drives tab and change the Count value to the number of net drives available (e.g., 1).
-
Configure the settings for the network drive.
-
Description: Assigns a reference name to identify this storage location.
-
Type: SMB (Server Message Block) or NFS (Network File System) protocol. For Windows OS select Drive SMB.
-
Address: Specifies the static IP address of the PC or NAS.
-
Username: Identifies the login username for the PC or NAS.
-
Password: Provides the password associated with the login account.
-
Directory: Specifies the name of the folder within the shared directory (add a forward slash to the shared folder directory, e.g. /Data).
-
-
Click OK to save the changes and close the Controller settings dialog.
-
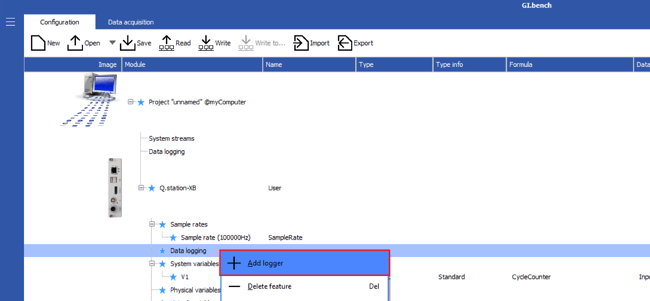
In the project tree, right-click on Data logging listed under the Q.station controller and select Add logger.
-
Double-click the newly created logger to open the Data logger settings dialog.
-
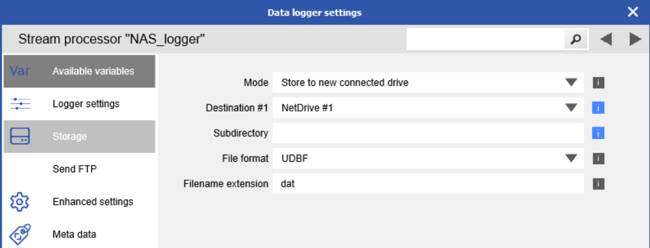
Navigate to the Storage tab and select 'NetDrive #1' from the Destination field.
-
Change any remaining settings in the Storage tab and other tabs as needed. Click OK to save changes and close the Data logger settings dialog.
-
When complete, save the changes to the controller by clicking the Write button in the toolbar.

- After the controller project has been updated, apply the trigger to start the logging process (the logger will begin logging automatically if the logger type is Continuous). The data files will now be saved into the shared folder on the PC or NAS.