
Q.series Controller Synchronization with SNTP on a PC
Purpose
This article will describe setting up a PC as an SNTP (Simple Network Time Protocol) server. This will allow us to set up the Q.series controller to synchronize automatically to the PC’s clock.
Requirements
- PC that synchronizes its clock whenever it is connected to the internet.
- Q.series controller
- Ethernet cable
Procedure
- For this document, we will be connected to a PC that has Windows 10 OS. For Windows XP users, skip to Step 8 for setup instructions. For Windows 10, 8, and 7 users, continue to Step 2.
- Stop the “Windows Time” service: START > Control Panel > System and Security >
Administrative Tools > Services:
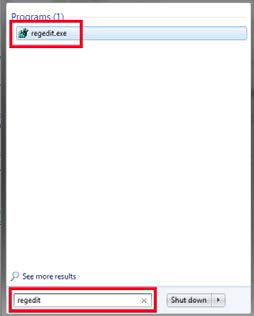
- Open the registry editor: START > type “regedit”
- Search for the code: “HKEY_LOCAL_MACHINE\SYSTEM\CurrentControlSet\services\W32Time\TimeProviders\NtpServer”
Set the “Enabled” value to 1: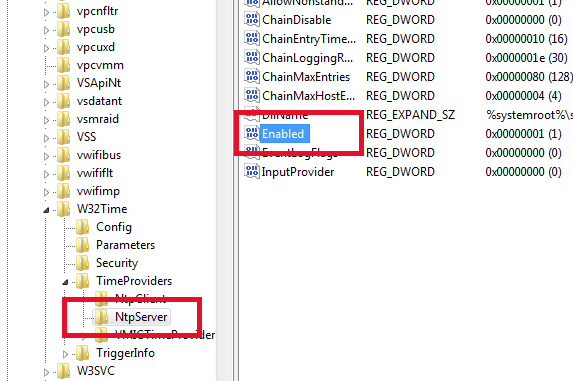
- Search for the code: “HKEY_LOCAL_MACHINE\SYSTEM\CurrentControlSet\services\W32Time\Config”
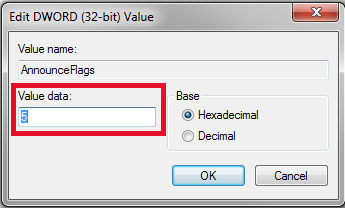
Set the “AnnounceFlags” value to 5: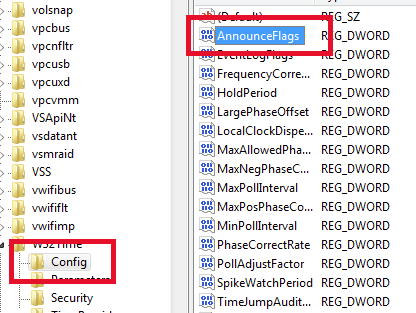
- Close the Registry Editor.
- Start the “Windows Time” and set the start type to “Automatic”:
Move onto Step 11.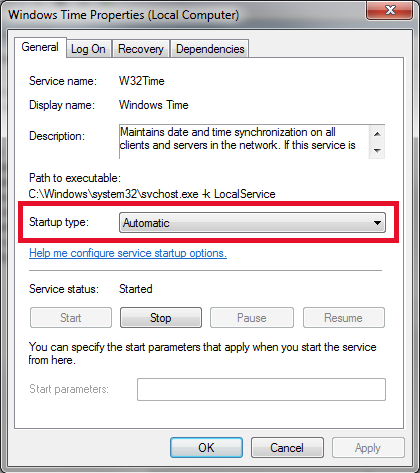
- Follow these instructions if you have Windows XP.
Open the registry editor: START > Run > type “regedit” - Search for the code: “HKEY_LOCAL_MACHINE\SYSTEM\CurrentControlSet\Services\W32Time\Parameters”.
Set the “LocalNTP” value to 1 (if “LocalNTP” value does not exist, create a new DWORD
value)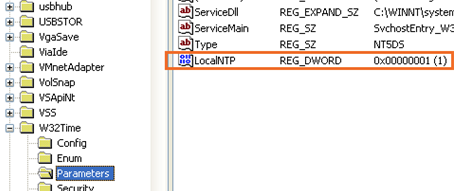
- Add the exception for the Port in the firewall settings. Windows Firewall > Advanced
Settings. - Inbound Rules > New Rule. Select Port, and click Next.
- Select UDP > Specific Port, 123. Click Next, and allow the connection. Give the rule a name.
- Restart the PC to apply changes.
- Open Gantner configuration software
- GI.bench
- Double-click controller to open Controller Settings window
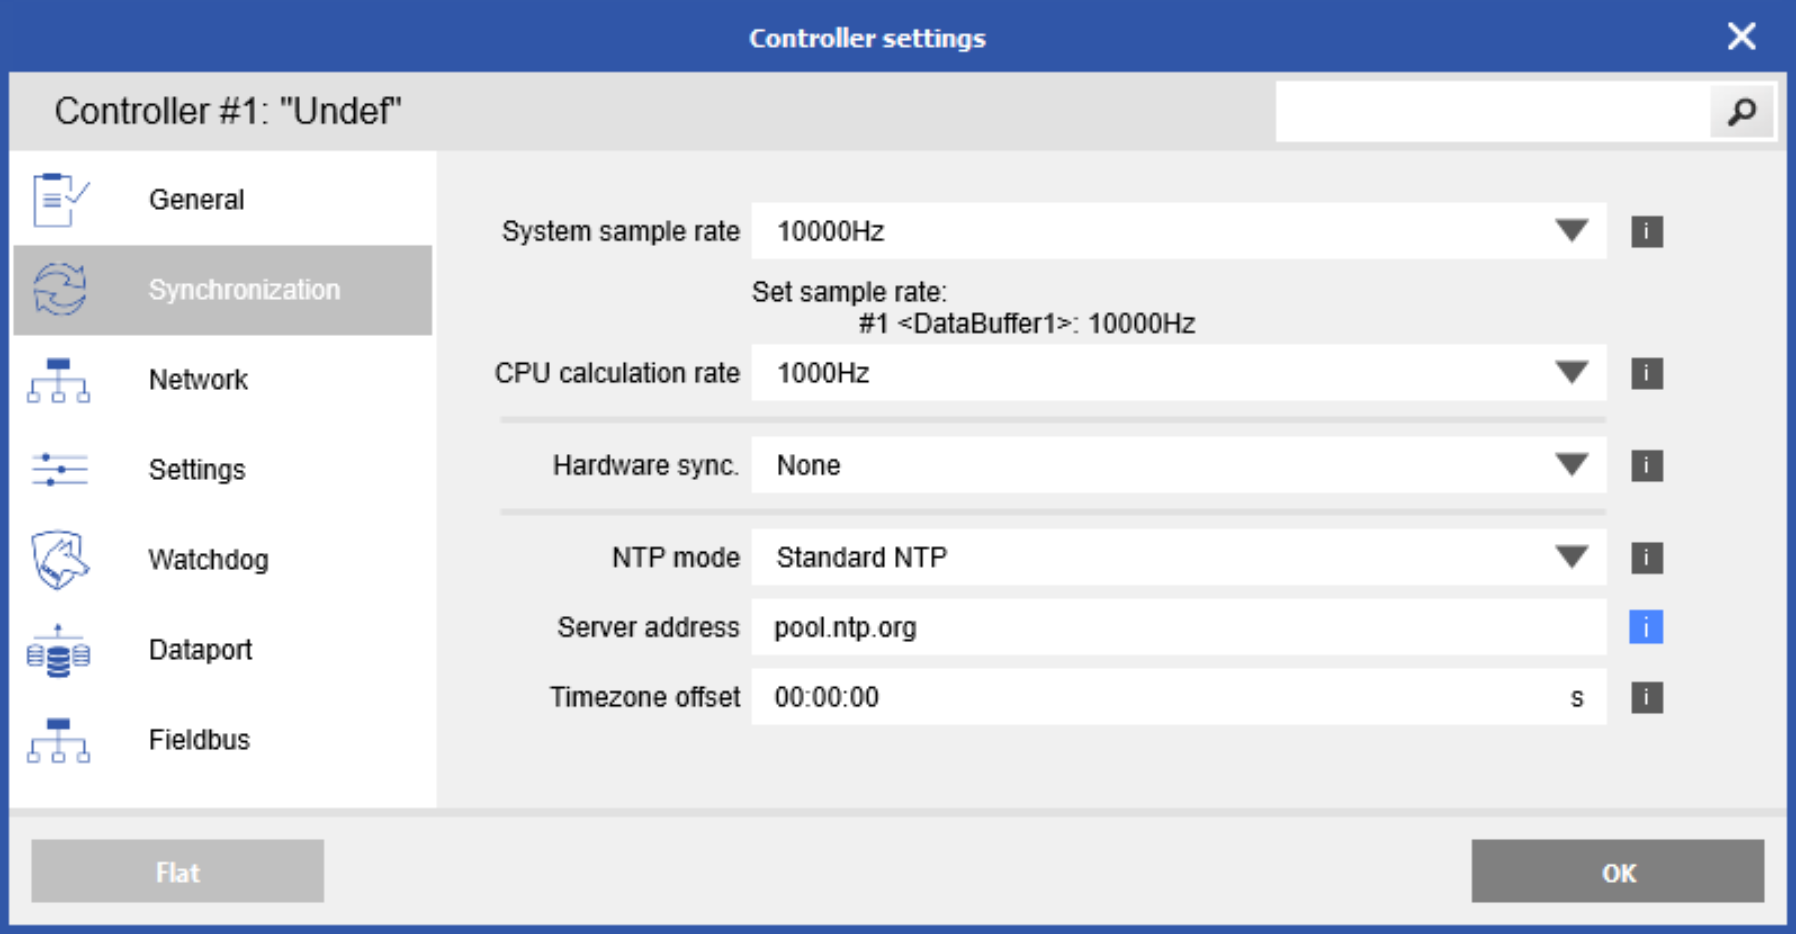
- Navigate to the synchronization section. Change the NTP module to Standard or Legacy NTP
- Enter the NTP server address and timezone offset
- Either enter static IP address of PC or a standard NTP server if there is a connection to the internet
- Double-click controller to open Controller Settings window
- GI.bench
After changing the time zone offset, a restart of the controller is required to initiate the new setting. Using a time zone offset is only necessary in special cases. Usually, the controller should run with UTC time (no offset!). GI.bench software automatically determines the local time zone offset to visualize the data with the correct local time on your PC, for example, in charts on your GI.bench dashboard. If you notice a time offset in your charts, it is most likely that the offset is configured in your controller.
-
- test.commander
- Go to the controller’s settings: Host Interface > SNTP > Client Settings.
SNTP mode: On
Server address: static IP address of the PC
Timezone offset: enter the offset from GMT in seconds (i.e., PST = GMT – 7:00 = -25200)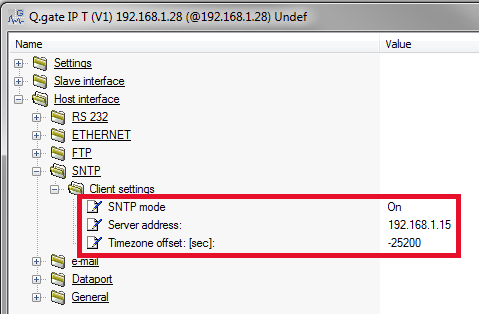
- Save the settings. Update the project to the controller.
- Go to the controller’s settings: Host Interface > SNTP > Client Settings.
- test.commander
- To check if the controller is properly synchronized after the controller has been updated,
click on the Read Online Values from Controller. - On the view online values page, click on the Set RTC button.
- If you attempt to manually synchronize the device to another time zone by clicking on
the synchronize button shown below, it will not allow you to synch. This means that the
device is indeed receiving its time from the PC.