1. Introduction
The video plugin runs on a Q.station controller and operates stand-alone.
Synchronization or video conditioning for visualization is typically handled by GPU libraries. Since the Q.station CPU board lacks a dedicated graphics card, all video functions should be executed within the Q.station firmware or the browser web UI. This may result in a high CPU load, but it should not compromise the accuracy of data measurements.
Synchronization is based on the camera's key frames, and the key frame number depends on the camera manufacturer, being consistently spaced. For instance, at 25 Frames Per Second (FPS), the frame number can dynamically change between two key frames if the camera chip doesn't recognize pixel changes. Therefore, cameras with a higher number of key frames are recommended for fast synchronization with Q.station.
Saving records is generally done in two formats: H.264 (proprietary) or MJPEG (GPL). H.264 is faster and recommended
NTP synchronization of the camera and Q.station is not used for synchronization but is a useful parameter when timestamps are plotted within the video.

A virtual variable is employed as a condition to initiate a recording. The records are saved on the internal hard drive of the Q.Station and can be visualized afterward in sync with the data measurements.
2. Hardware Requirements
- Q.station XB/T SSD
- Set to UTC time with NTP synchronization enabled
- Installed with firmware and video plugin with same compilation date
- IP Camera with RTSP (real time streaming protocol) stream
- Tested with 25 FPS
- Main Stream: 1920x1090 px resolution, 4096 kbps.
- Keyframe (I frame) interval should be 3-6
3. Installation and use
3.1 Install the plugin with corresponding Firmware
You may install both with GinsFirmwaremanager.exe
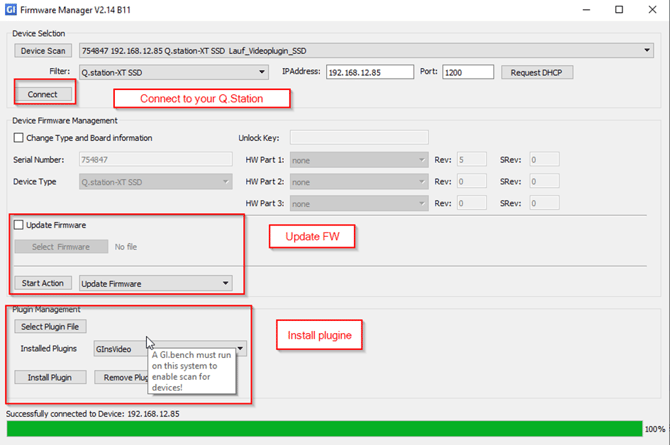
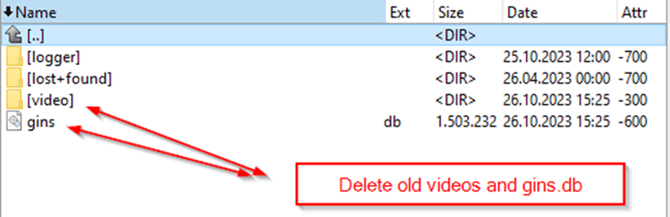
Remove old measurement and videos and database file of your Q.station.
Use FTP software (e.g. Total Commander) with FTP connection of User: 6 & Password: 6

hd0: Internal hard drive
hd1: 1 TB SSD

If you have a lot of files you may need to connect with ssh to the Q.station (Putty). Please contact Gantner Instruments support for instructions.
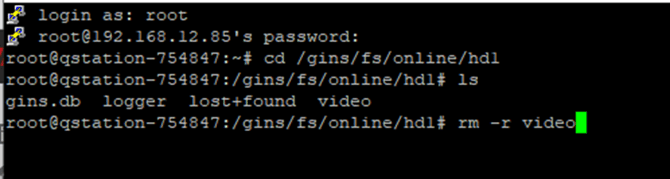
Once in the hd1 directory rm -r video to delete all video folders and files
Be careful to not use rm command to delete the wrong directory can destroy the operating system
If you have an older or wrong plugin configuration installed you may delete it from the following directory:

cd /gins/fs/config/plugins/GInsVideo
rm VideoConfiguration.xml
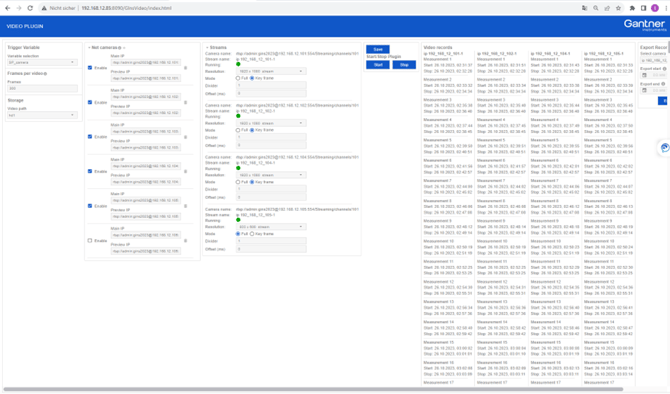
3.2 Call up the Plugin Website: <IP of Q.station>:8090/GInsVideo/index.html
3.3 Select a virtual Variable to start the recording of the camera

3.4 Enter the amount of frames per Video
This is the total number of frames in the video
Example: set the Frames to 250 with a camera set to 25 FPS (frames/second) will result in 10 second files

3.5 Configure the Camera
Main IP: RTSP stream for recording
Preview IP: RTSP stream for live visualization. Enter a sub stream with low resolution.

Example HIK Vision stream : rtsp://user:pw@192.168.12.101:554/Streaming/channels/101
3.6 Click Save

The plugin is now configured, no need to click start.
3.7 Call up the Web UI of the Q.station: <IP of the Q.station>:8090
This will take you to the controller dashboard. When the trigger is higha previous will be shown after a few seconds. You may need to refresh the browser a few times.
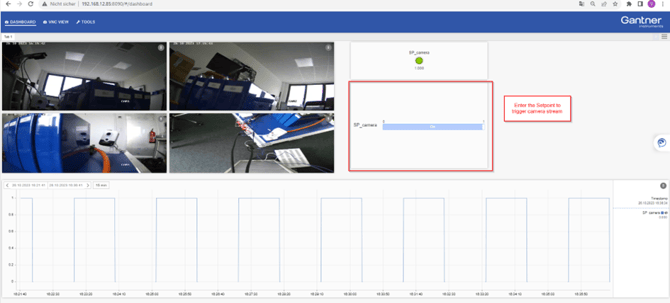
When trigger is high, you should see a green camera stream in the plugin web UI, if not the RTSP stream is probably configured incorrectly.

You can also verify the RTSP stream with VLC media player.
Media > Open Network Stream...


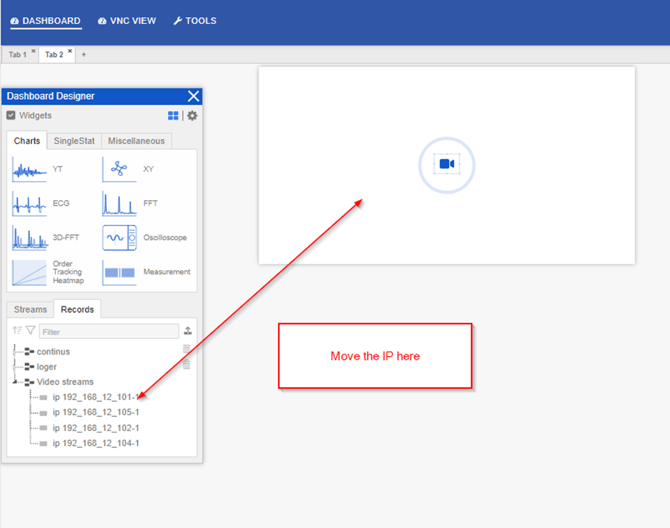
In the Dashboard, create a Video widget under the Misc tab of the Dashboard Designer

Go back to the charts tab and switch from Streams to the Records tab. The video stream will be available here.
It may take some time to see the IPs of the video streams for the first time.

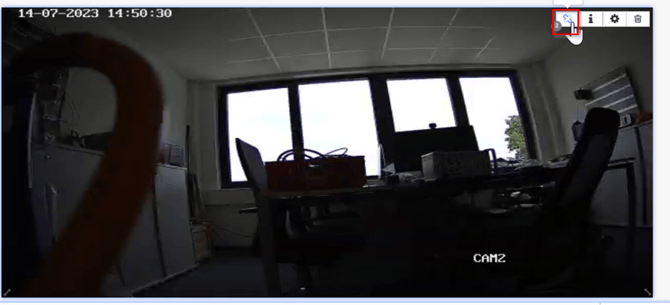
3.8 Use chart Links to connect the Video with a measurement
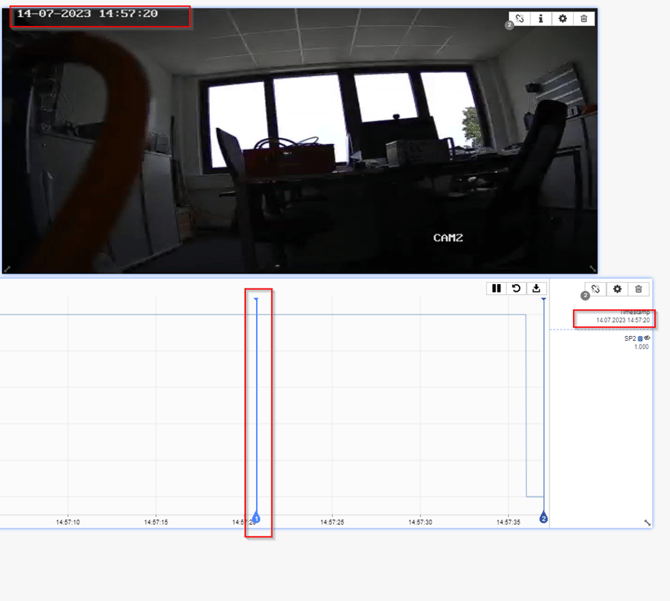
Click the link icon for the video plugin element and the Y-T chart (only history data is allowed in for Y-T chart).
When moving the first cursor, the video will be synchronized to the marked time in the measurement chart
3.9 Export
Files will be saved on hard drive. Avoid using USB drives as this is too slow to record video and export. The list of measurements is actualized in the plugin.
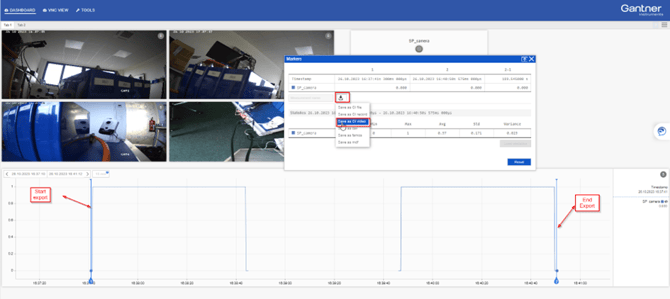
All linked videos will be exported. As you can see the size of the first video is much higher than the others. Encoding H264+ was not used for the first Video.

4. Tips
- Avoid multiple HD streams (e.g. VLC) that could fill the network bandwidth
- live view, no link to measurement values if viewing controller dashboard