The most common protocols used for file transfer today are FTP, FTPS, and SFTP. Q.series controllers support FTP and SFTP, but FTPS is not supported.
Controller Configuration
-
Open an existing GI.bench project or read the current controller configuration into a new project. Then, double-click the controller to open the controller settings.
-
Navigate to the FTP Clients section, set the connection count to 1, and press Enter.
-
Modify the connection settings to match the FTP server configuration:
-
Address: The IP address or hostname of the FTP server.
Note: When using a hostname instead of an IP address, ensure that a DNS address (e.g., 8.8.8.8) is configured in the controller’s network settings. -
Port: The FTP server's listening port (typically 21; vary depending on server settings)
-
Username: The user account configured on the FTP server
-
Password: The password for the user account
-
Type: Set to Unknown (other options include Unix, MS-DOS, SFTP)
-
Directory: Specify the target directory on the server, or leave blank to use the root directory

-
-
On the controller, open the data logger and go to the Send FTP section. Check the Enabled box and select the appropriate FTP connection.

- Write the updated configuration to the controller to enable FTP functionality.
How to setup an FTP server on a PC
In this example of how to set up an FTP server, the FileZilla Server for Windows is used.
- Download and install the FileZilla Server for Windows.
- Add FileZilla as an exception to Windows Firewall or turn the Firewall off
- Open Control Panel
- Navigate to System and Security > Windows Firewall
- On the left-hand menu, select Allow a program or feature through Windows Firewall
- From the list, select FileZilla Server and FileZilla Server Interface or select
Allow another program if the programs aren’t already listed.- If not on the list select Allow another program
- In the next window scroll and find the 2 programs
- If not listed there select Browse and navigate to the installation directory: C:\Program Files\FileZilla Server
-
-
- Select one program and click Open, repeat for the second program
- Select one program and click Add, repeat for the second program
- For each program click the check the boxes then click OK.
-
- Run the FTP Server. Use the default settings and click OK. It will prompt you to create an admin password.
- Server Address: 127.0.0.1
- Port: 14148
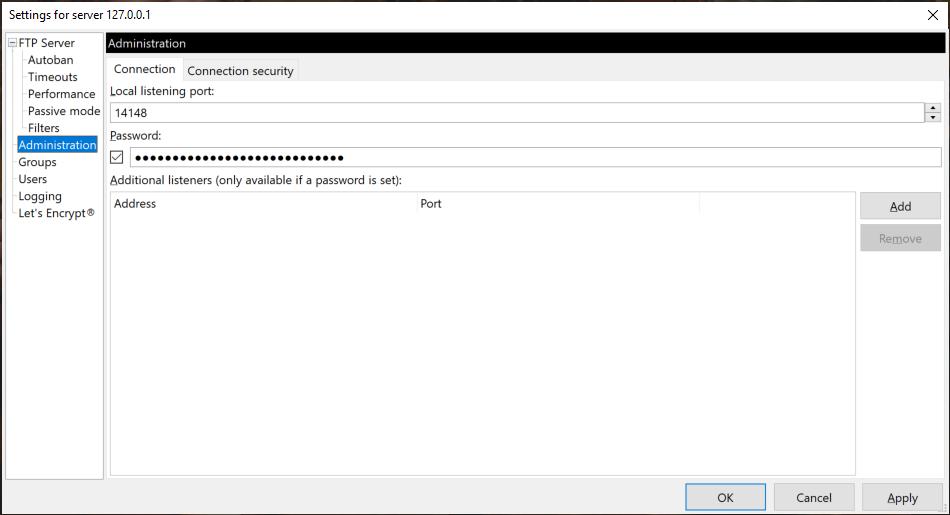
- Go to Server > Configure
- In the server settings window, navigate to the Administration section. The listening port and password previously defined will be shown
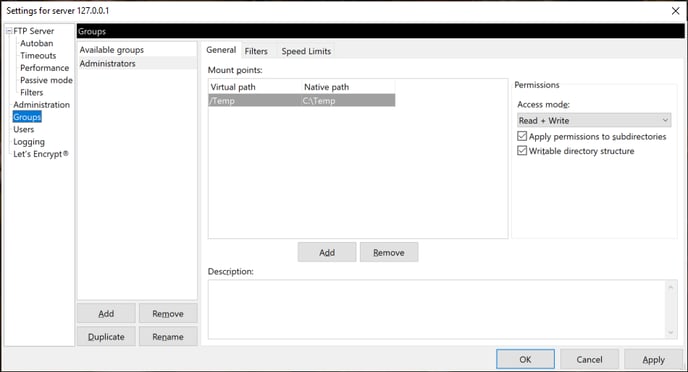
- Navigate to the Groups section. Add a new group. Define the virtual and native paths.
- In the server settings window, navigate to the Administration section. The listening port and password previously defined will be shown
- Navigate to the Users section
- Click Add to create a new user and give them a name
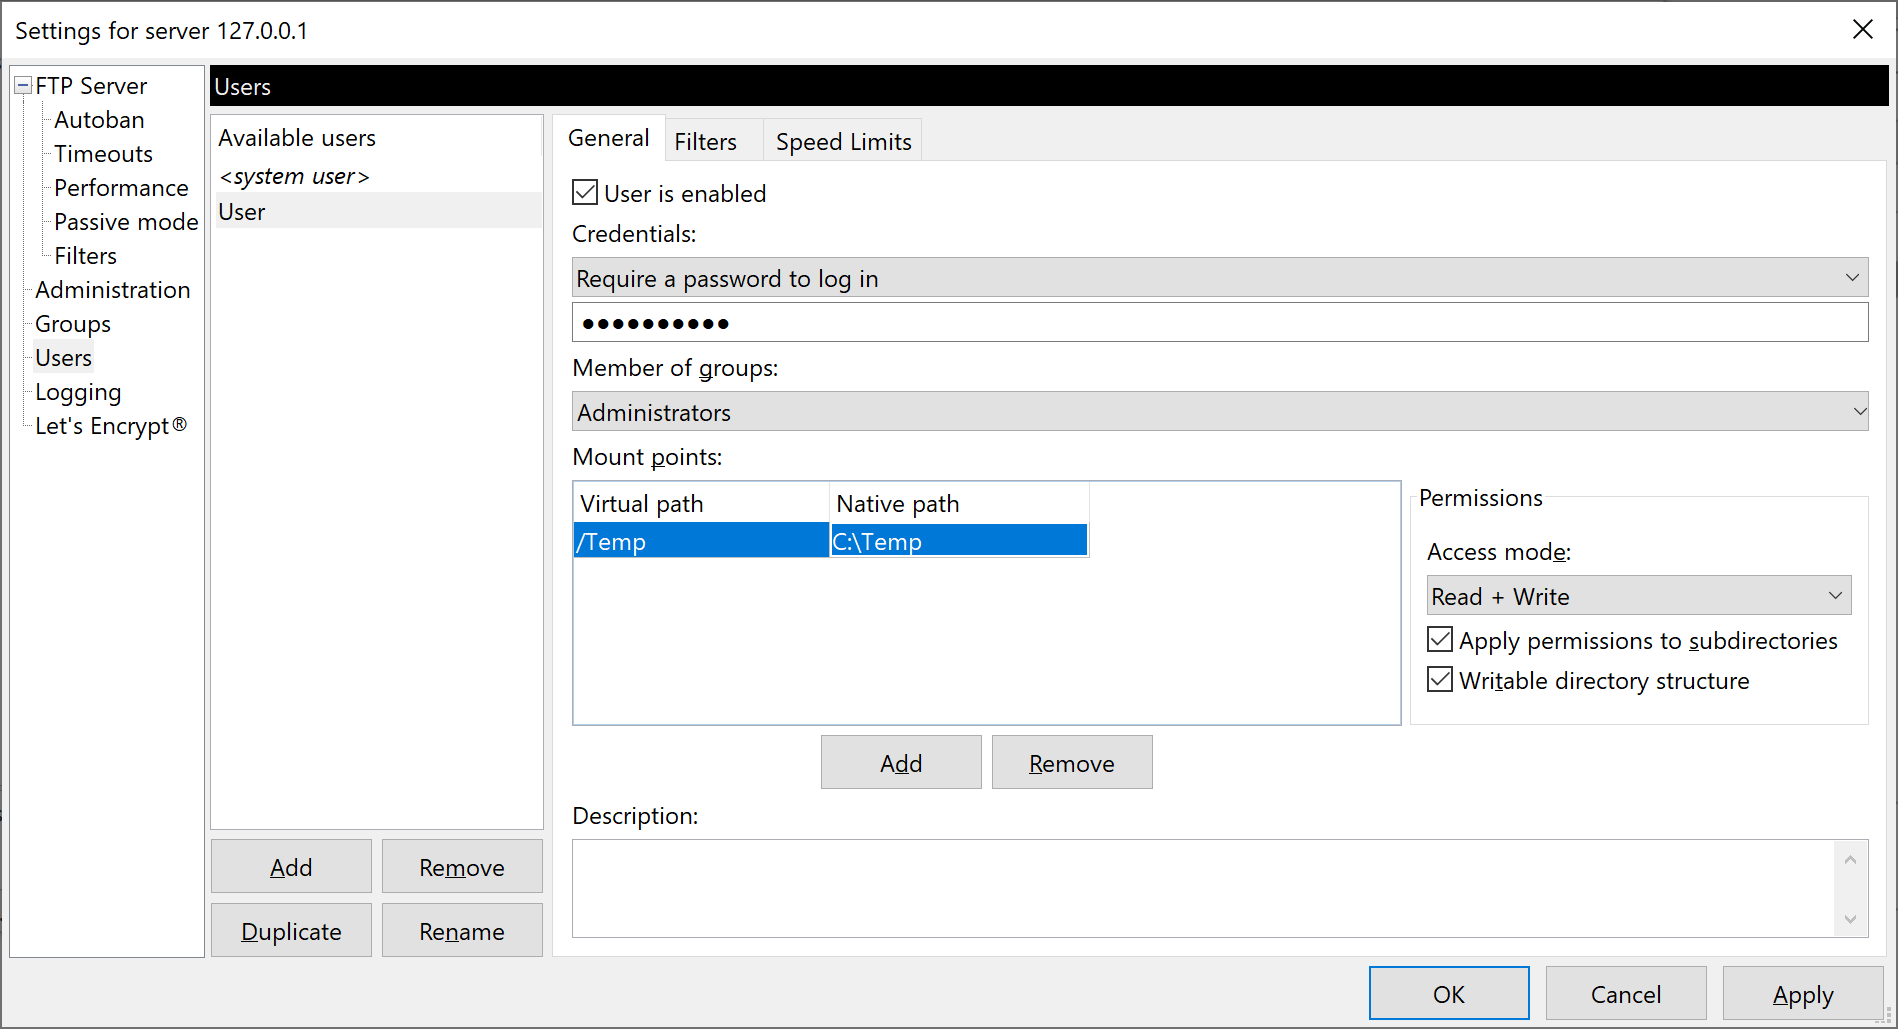
- Make sure the box for User is enabled is checked. Change the credentials option to require a password. Enter the desired password.
- Enter virtual and native paths. Make sure the access mode is set to Read + Write
- Click OK to save settings.
- Click Add to create a new user and give them a name
Common FTP Errors
FTP Error: 550 SSL/TLS required on the control channel
This error indicates that the FTP server requires an encrypted connection (SSL or TLS), commonly known as FTPS, which is not supported by Q.series controllers. For secure file transfer, it is recommended to use SFTP instead.
SendFTP: Failed to open connection <failed to do name resolution of hostname>
A hostname has been specified in the FTP client settings, but no DNS address is configured in the controller’s network settings. As a result, the hostname cannot be resolved to an IP address the controller can use.