
How to connect to the CAN interface of a Q.station controller
Purpose
This guide describes how to connect to the CAN interface of a Q.station controller. The Q.station has 1 x CAN interface available. The connection is located on the bottom side of the controller and marked as CAN1-H (high) and L (low). The configuration for the CAN interface is done using GI.bench or test.commander
Procedure (GI.bench)
Reading/writing to external signals
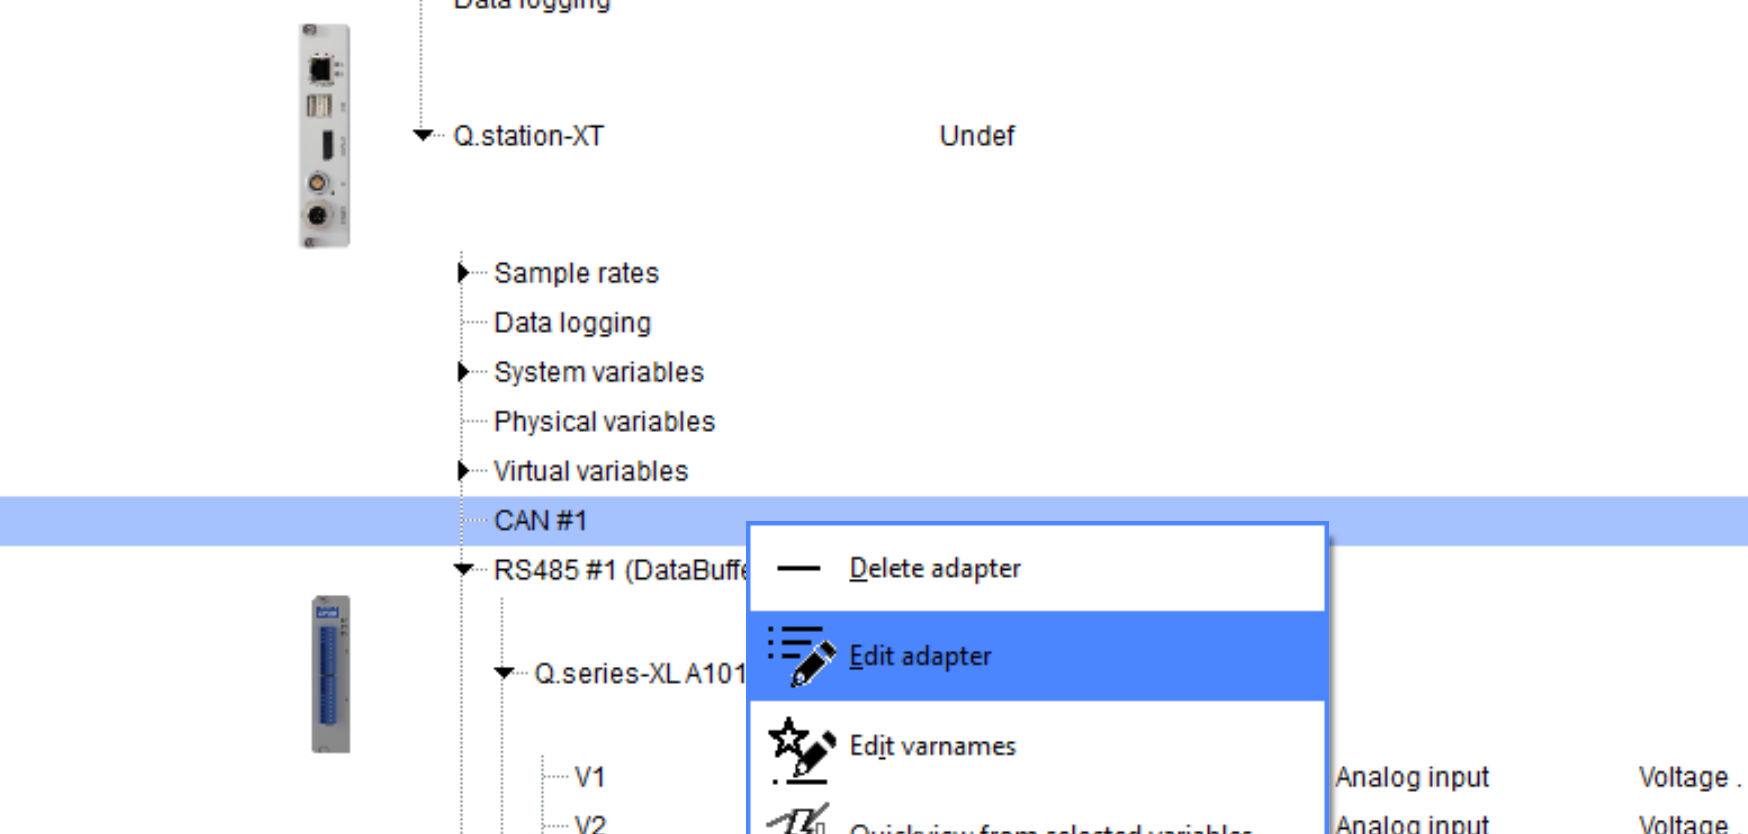
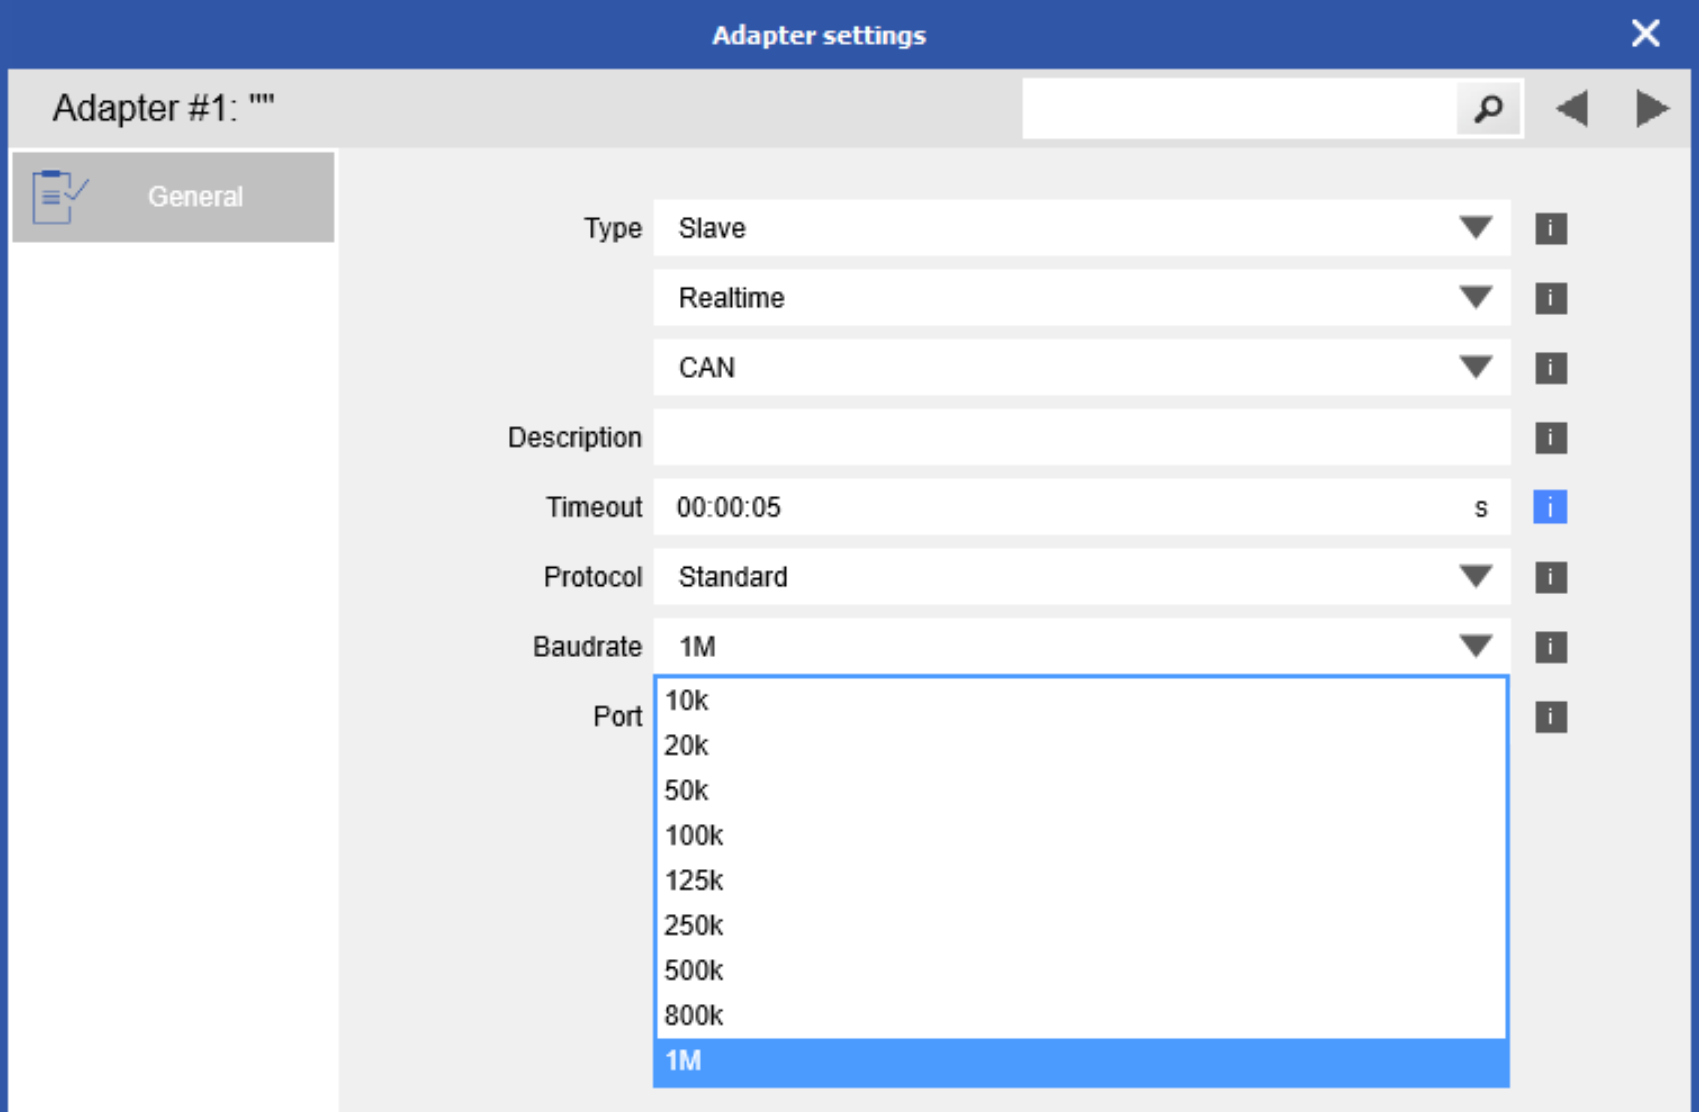
- Set the correct baud rate of the bus. Under the controller in the project window, right-click CAN #1 > Edit Adapter
- Supported baud rates: 10000, 20000, 50000, 100000, 125000, 250000, 500000, 800000, 1000000
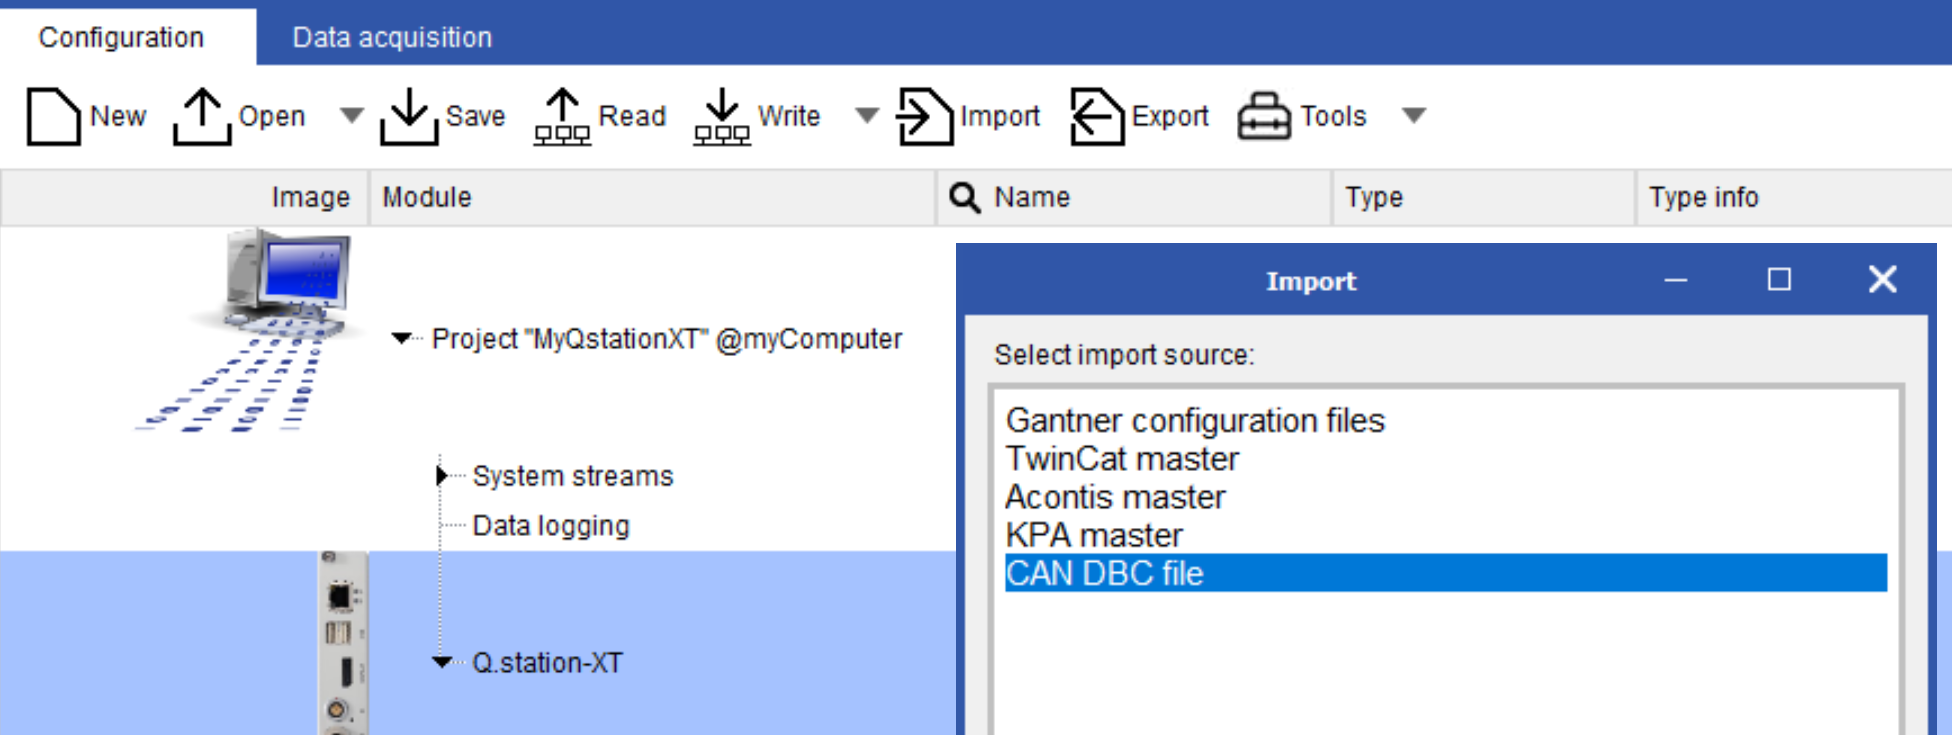
- It is possible to import a .dbc file to automatically create the CAN virtual variables. Import
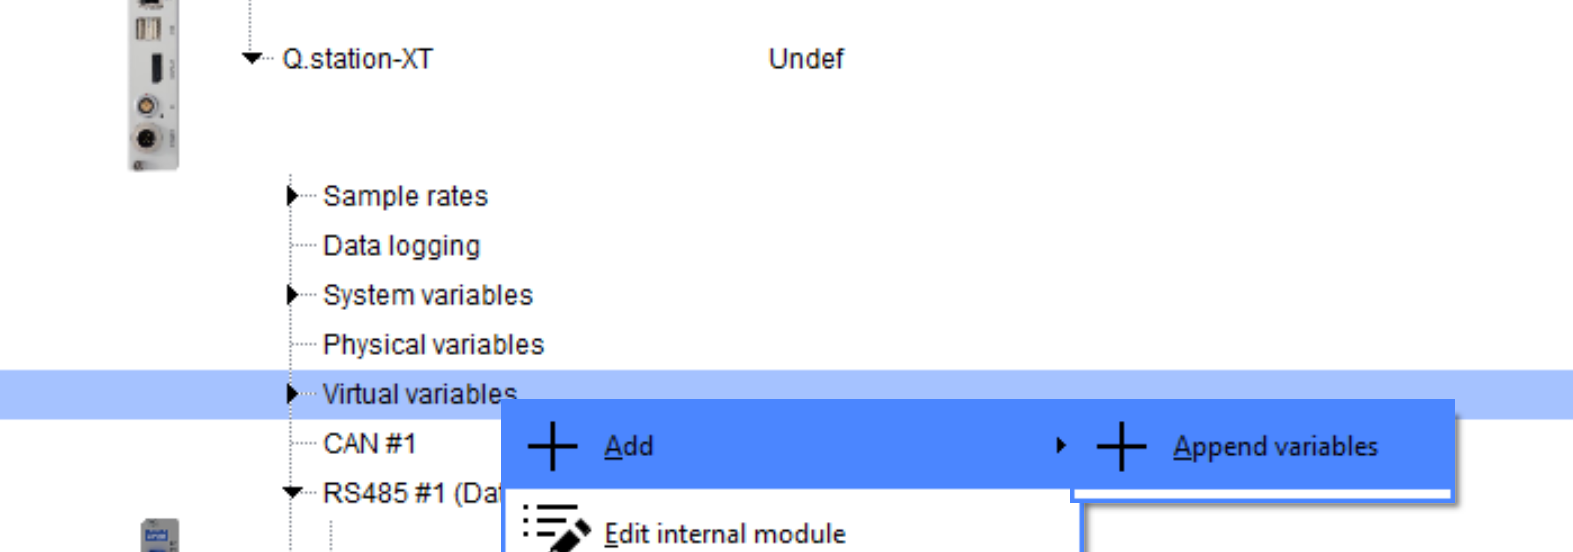
- To manually create CAN variables: right-click Virtual Variables > Add > Append Variables. Select how variables to add and click OK.
- Change type to Remote and Remote type to CAN
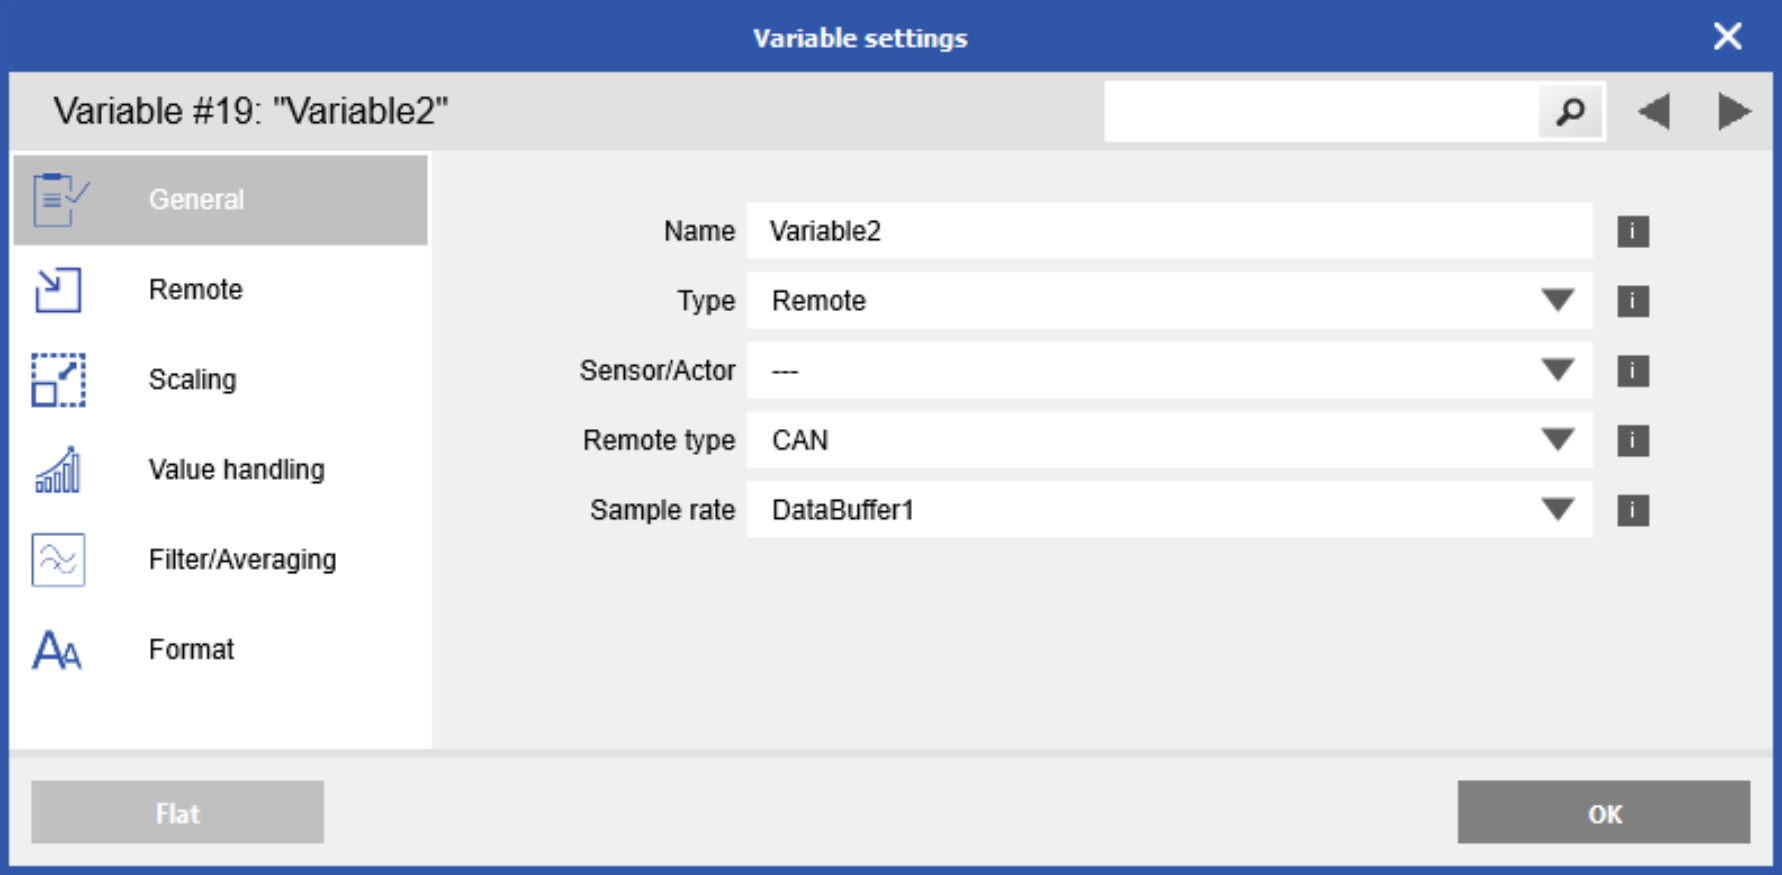
- Go to the Remote section to enter the CAN parameters
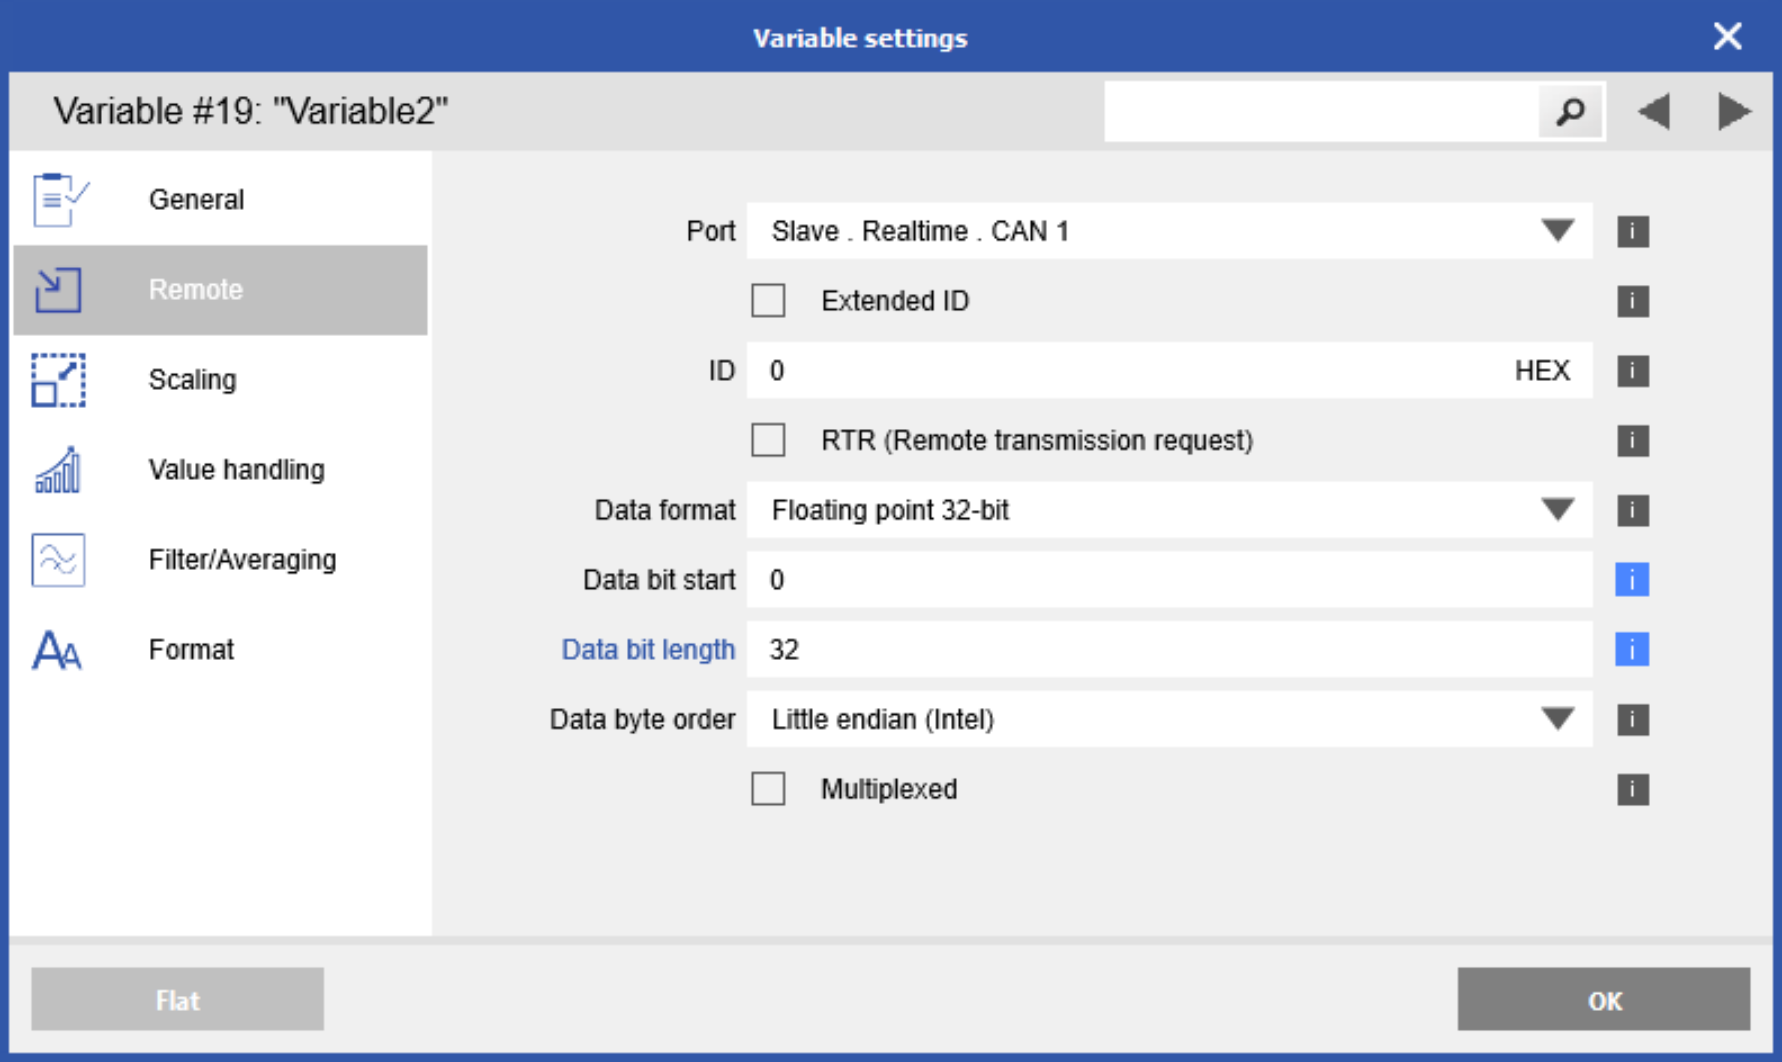
- Click OK to save changes
Configure DAQ IO to be read over CAN
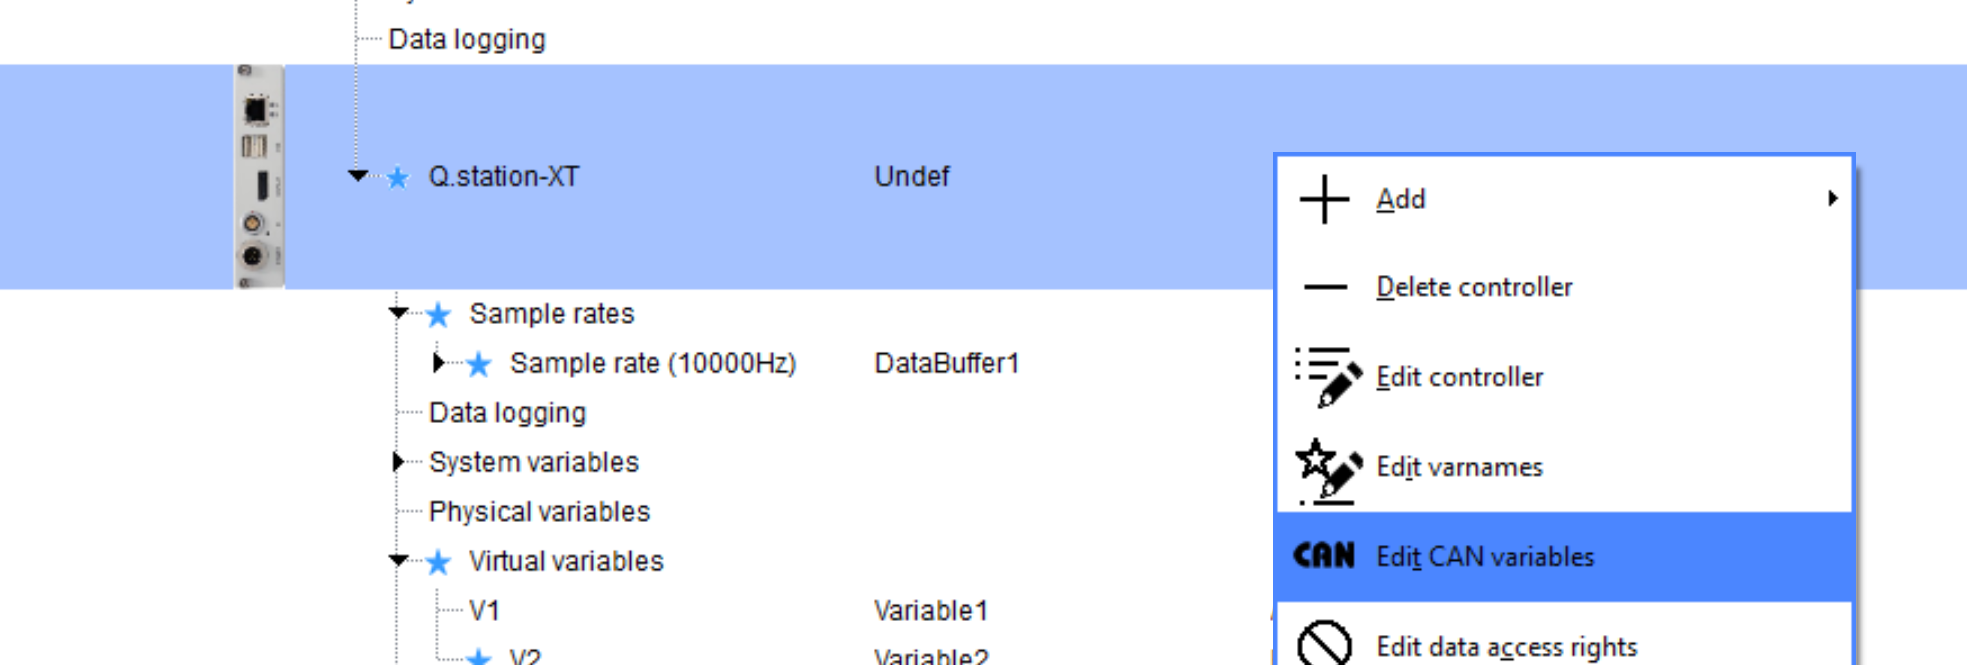
- Right-click controller and select Edit CAN Variables
- Select each channel or shift-click to highlight multiple variables. Check the box for the desired CAN bus.
- For each channel you can edit byte order, data type, control type, multiplexing, etc.
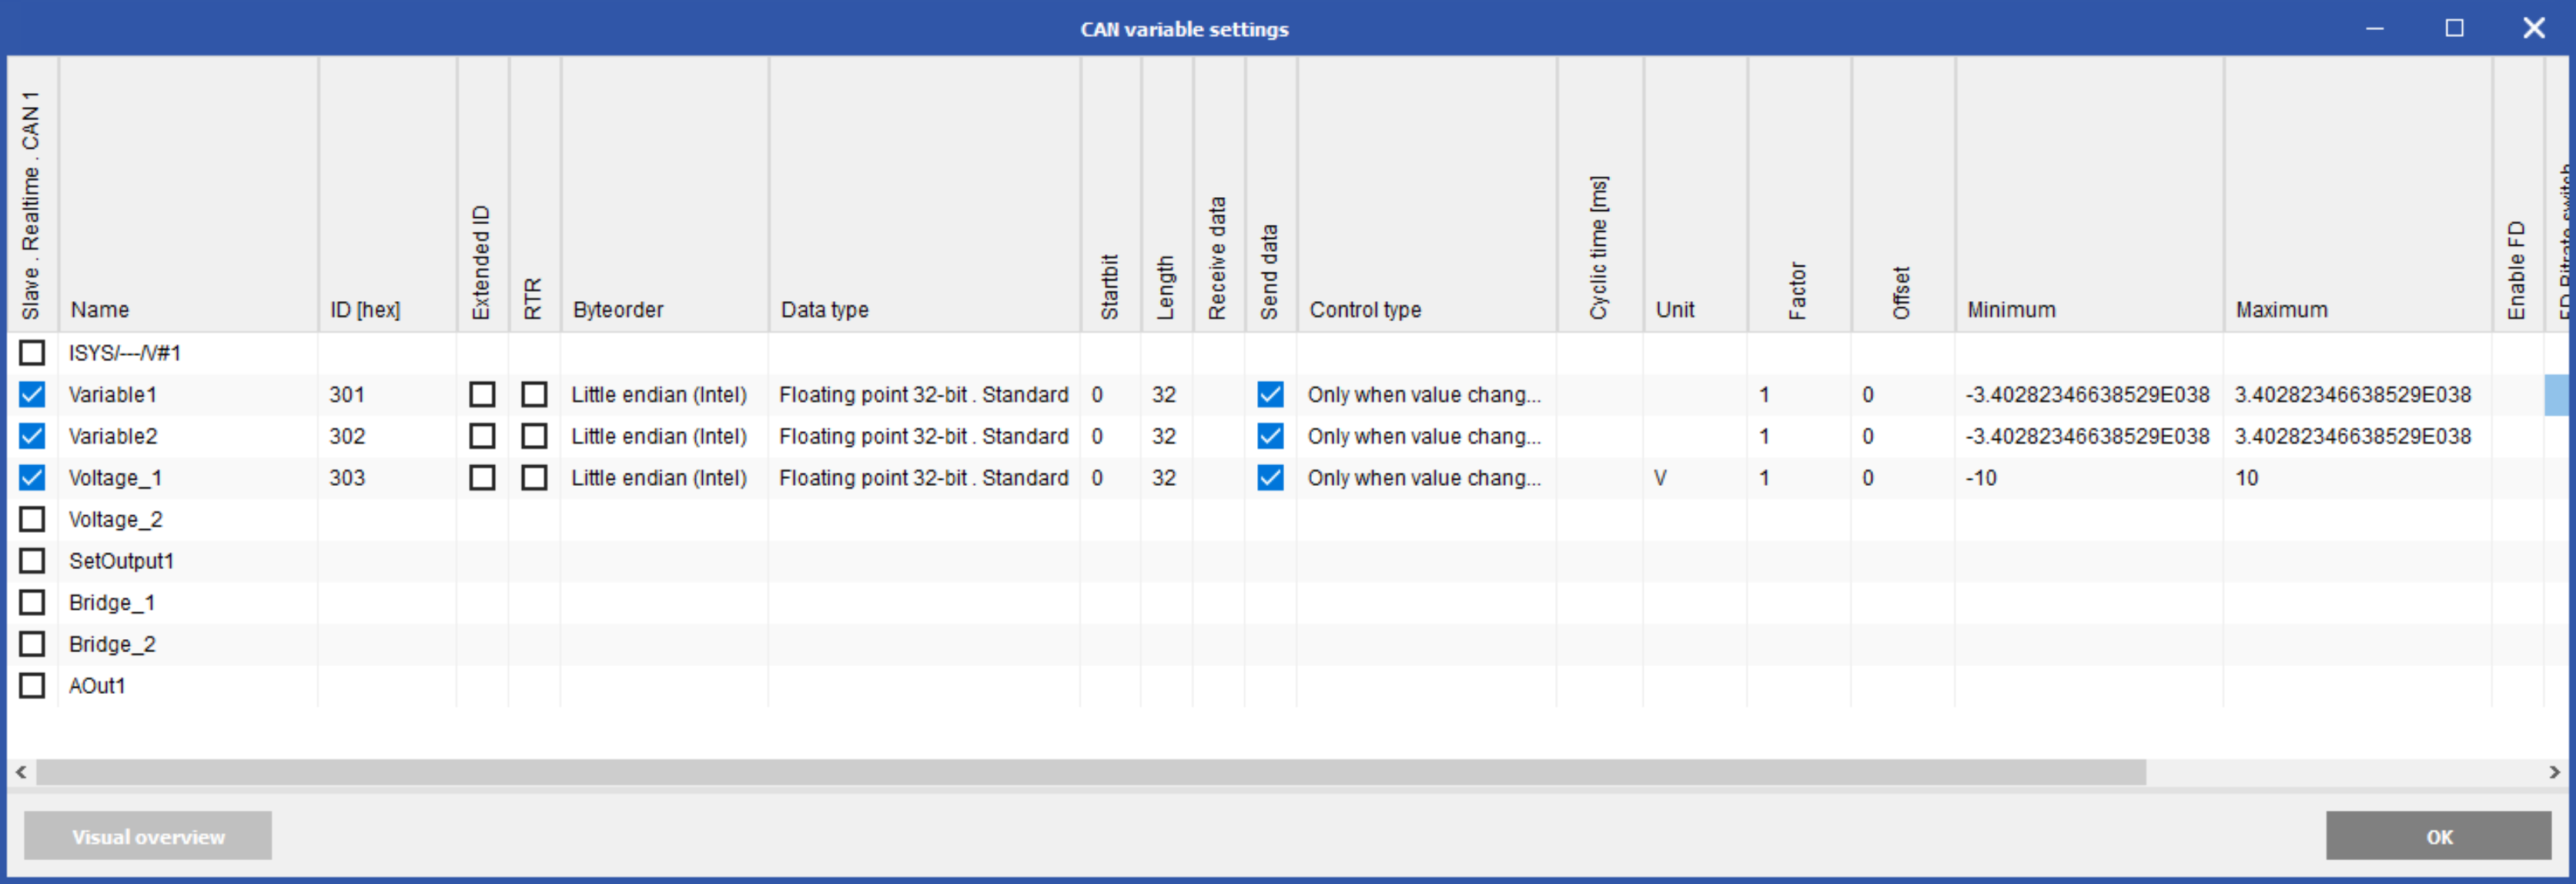
- Click OK to save changes then write updates to controller
Procedure (test.commander)
- Set the correct baud rate of the bus. Go to the Q.station settings > Slave Interface > CAN#1
Supported rates: 10000, 20000, 50000, 100000, 125000, 250000, 500000, 800000, 1000000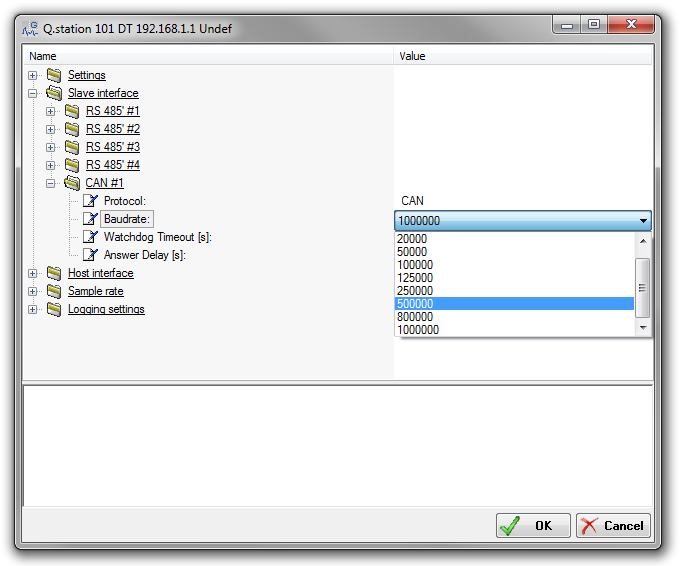
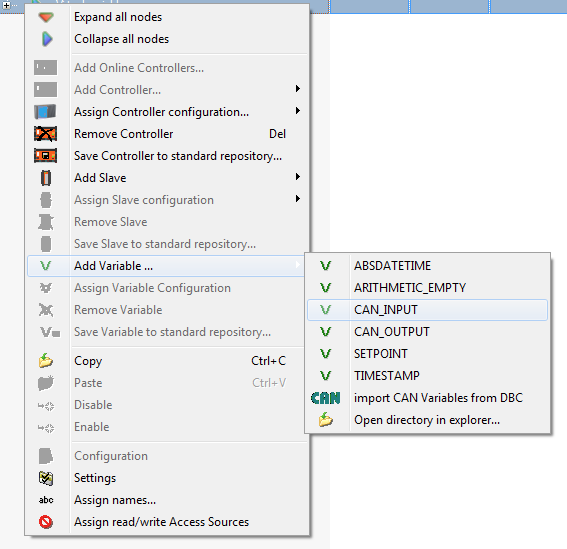
- Add a CAN message: for every message, read or write on the CAN bus, one variable has to be added to the virtual variables section of the Q.station. Right-click on virtual variables > Add Variable > CAN_INPUT or CAN_OUTPUT.
- Double-click on the new virtual variable that was created, and the settings window for the CAN message will appear:
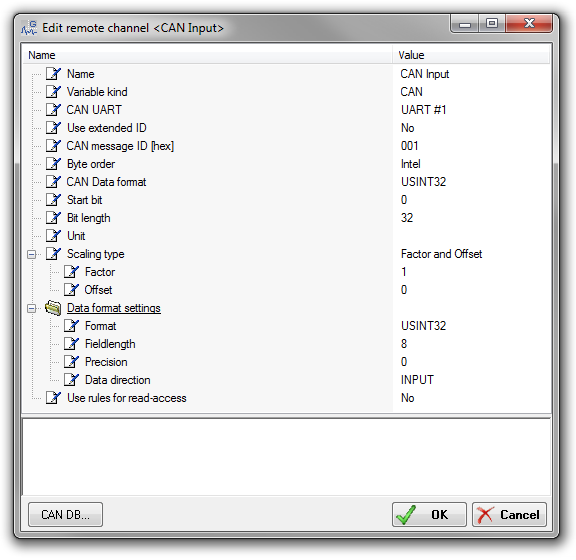
- Parameters for a CAN message:
- Name: variable name
- Variable kind: this has to be set to CAN (default)
- CAN UART: only UART#1 can be selected.
- Use extended ID: either a base identifier or an extended identifier is needed.
- CAN message ID [hex]: the base ID is a maximum of 11 bits (hex 7FF), and the extended ID is a maximum of 29 bits (hex 1FFFFFFF).
- Byte order: the standard byte order of a CAN message is Intel. In some cases, it might be necessary to switch the byte order. Therefore, Motorola is also supported.
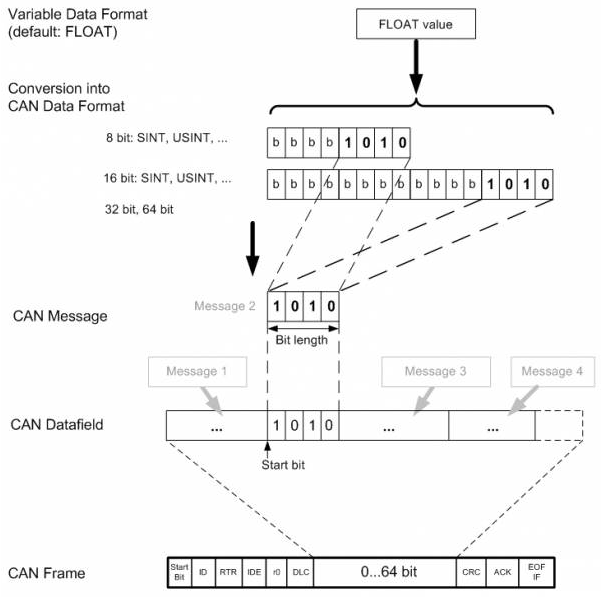
- CAN Data format: defines the data format in the CAN message. This has to be a valid format to interpret the data correctly.
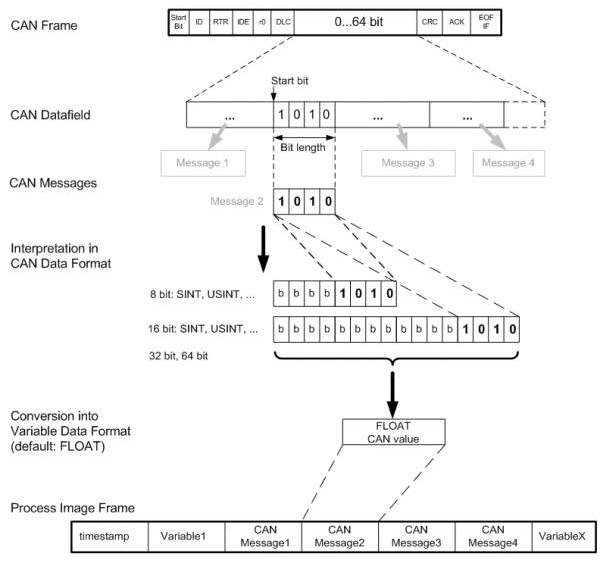
- Start bit: a CAN frame consists of a maximum of 64 bits of data and can include multiple CAN messages. Ex: 2 x 8-bit, 1 x 16-bit, 1 x 32-bit messages. With this, the start bit of the message to read into the CAN frame is defined.
- Bit length: the maximum bit length of a CAN message is defined by the selected CAN data format but can also be less. Ex: if the CAN data format is 16 bits, and the bit length is only 5, the missing bits will internally be filled up or cut off to be able to convert it correctly.
- Scaling Type: a linear scaling of the measurement value is possible with Factor & Offset or 2-point calibration.
- Data format settings: this is the internal data format used in the controller. When reading a CAN message, the value represented in the CAN data format will be converted into this format for integration into the controller process and vice versa.
- Additional parameters for a CAN output message:
- Set Data direction > OUTPUT, INPUT/OUTPUT: Source: the output source is the channel itself
- Set Data direction > EMPTY: Source: as output source, any INPUT variable of the system can be selected.
- Write CAN messages control:
- Only when the value changes
- Write always
- Cyclic
- On host
- On variable > 0.5
- Data Processing
- Read CAN message:
- Write CAN message:
- Read CAN message:
More information about CANbus: http://en.wikipedia.org/wiki/CAN_bus