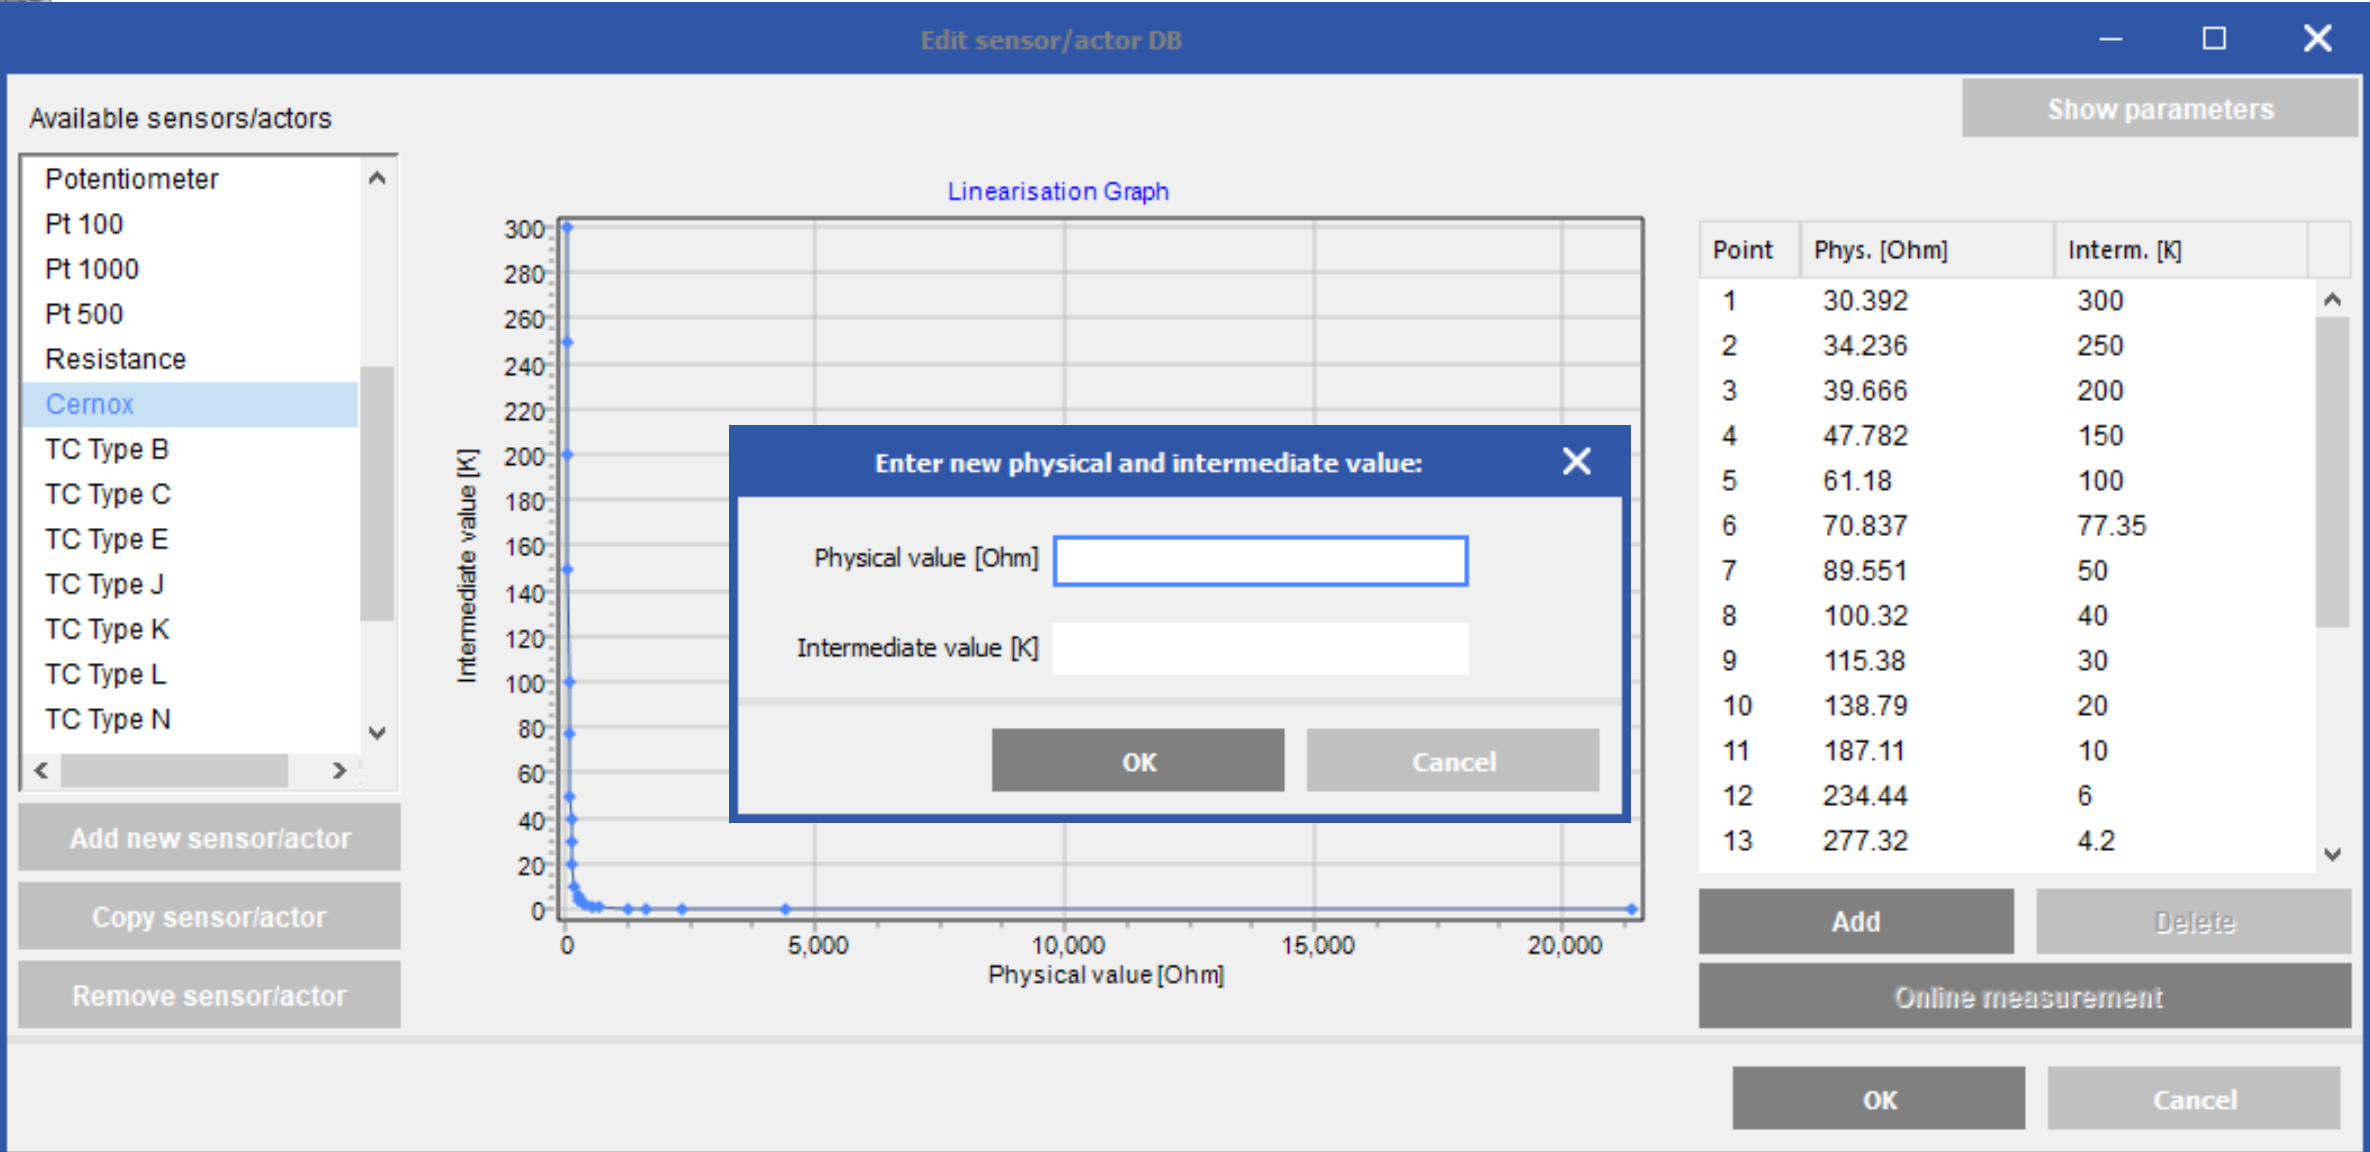
Note: In this learning example, we use a non-linear Cernox cryogenic temperature sensor with the calibration table shown below.

-
Run GI.bench and navigate to Edit Sensor/Actor DB from the left-hand menu.

-
Select an existing sensor that you want to clone. In this example, select Resistance for the new Cernox sensor and choose Copy Sensor/Actor.

-
Click Show parameters. In this example, change the name to Cernox and set the unit to Kelvin (K).

-
Click Hide parameters in the top right to return to the previous section, where you can add or delete the linearization points. Click Add to insert additional points. When finished, click OK.
-
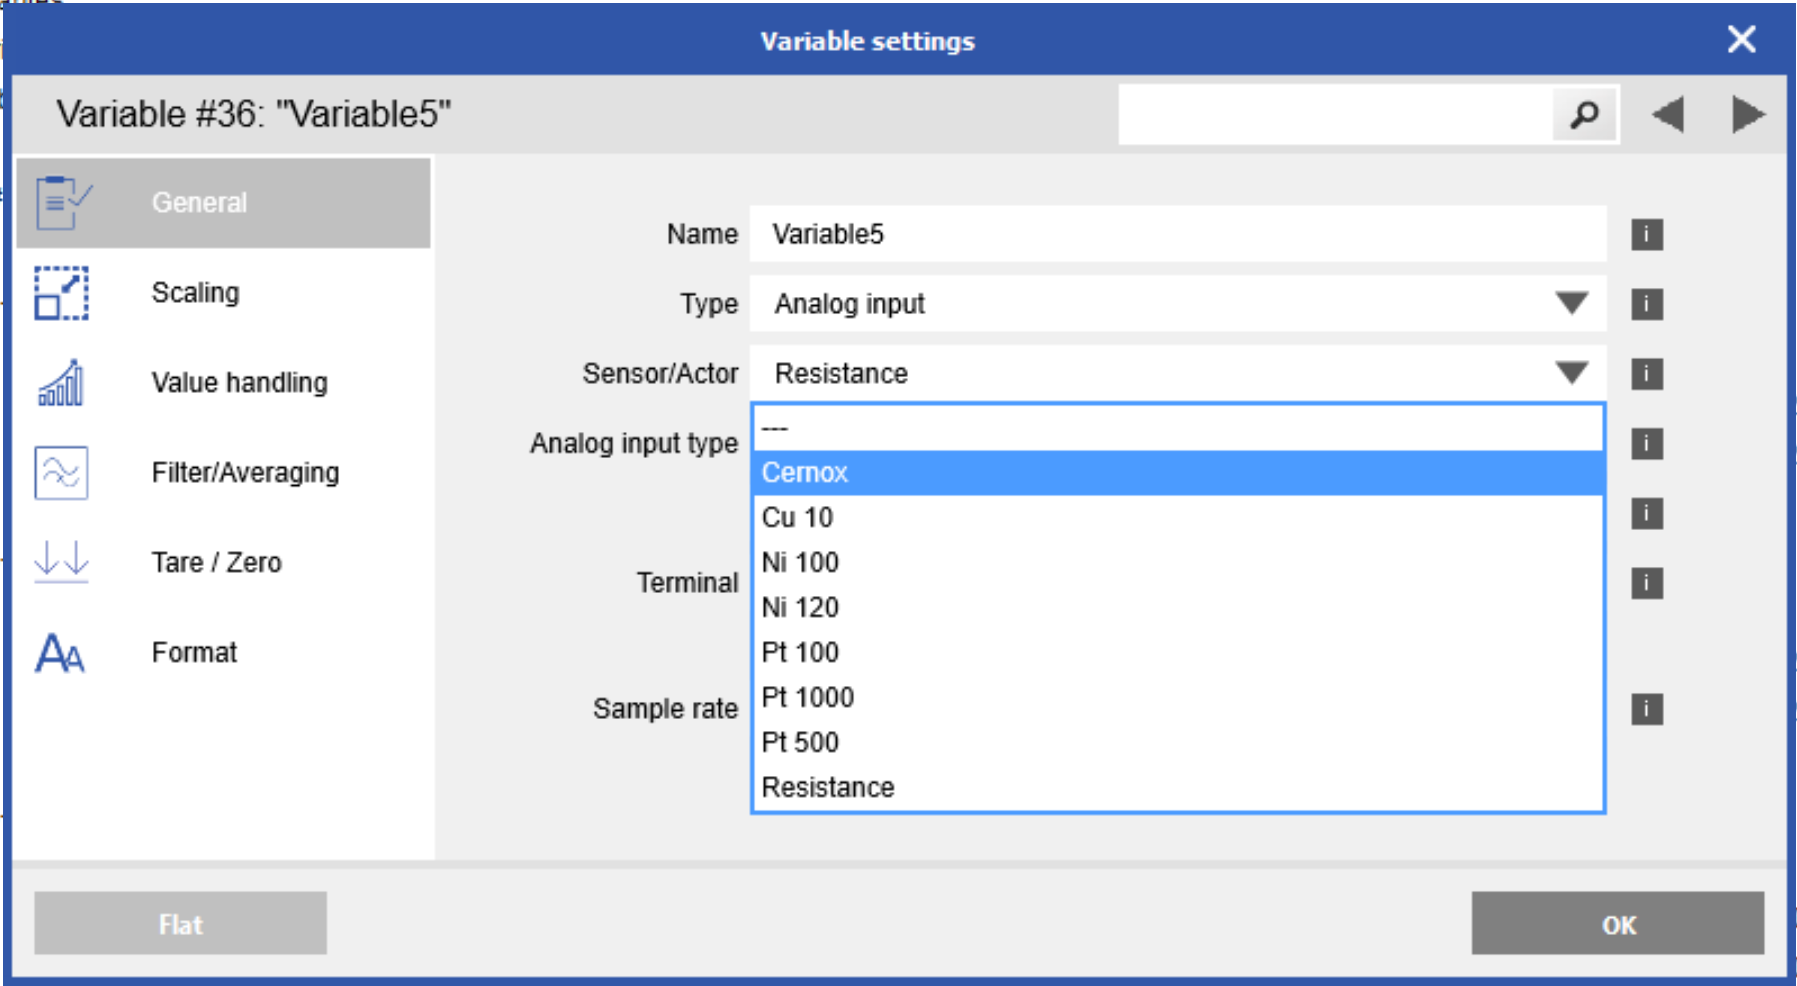
Now open a variable with the appropriate input type for this sensor, in this example a resistance input. Then select the custom sensor from the Sensor/Actor drop-down list.
-
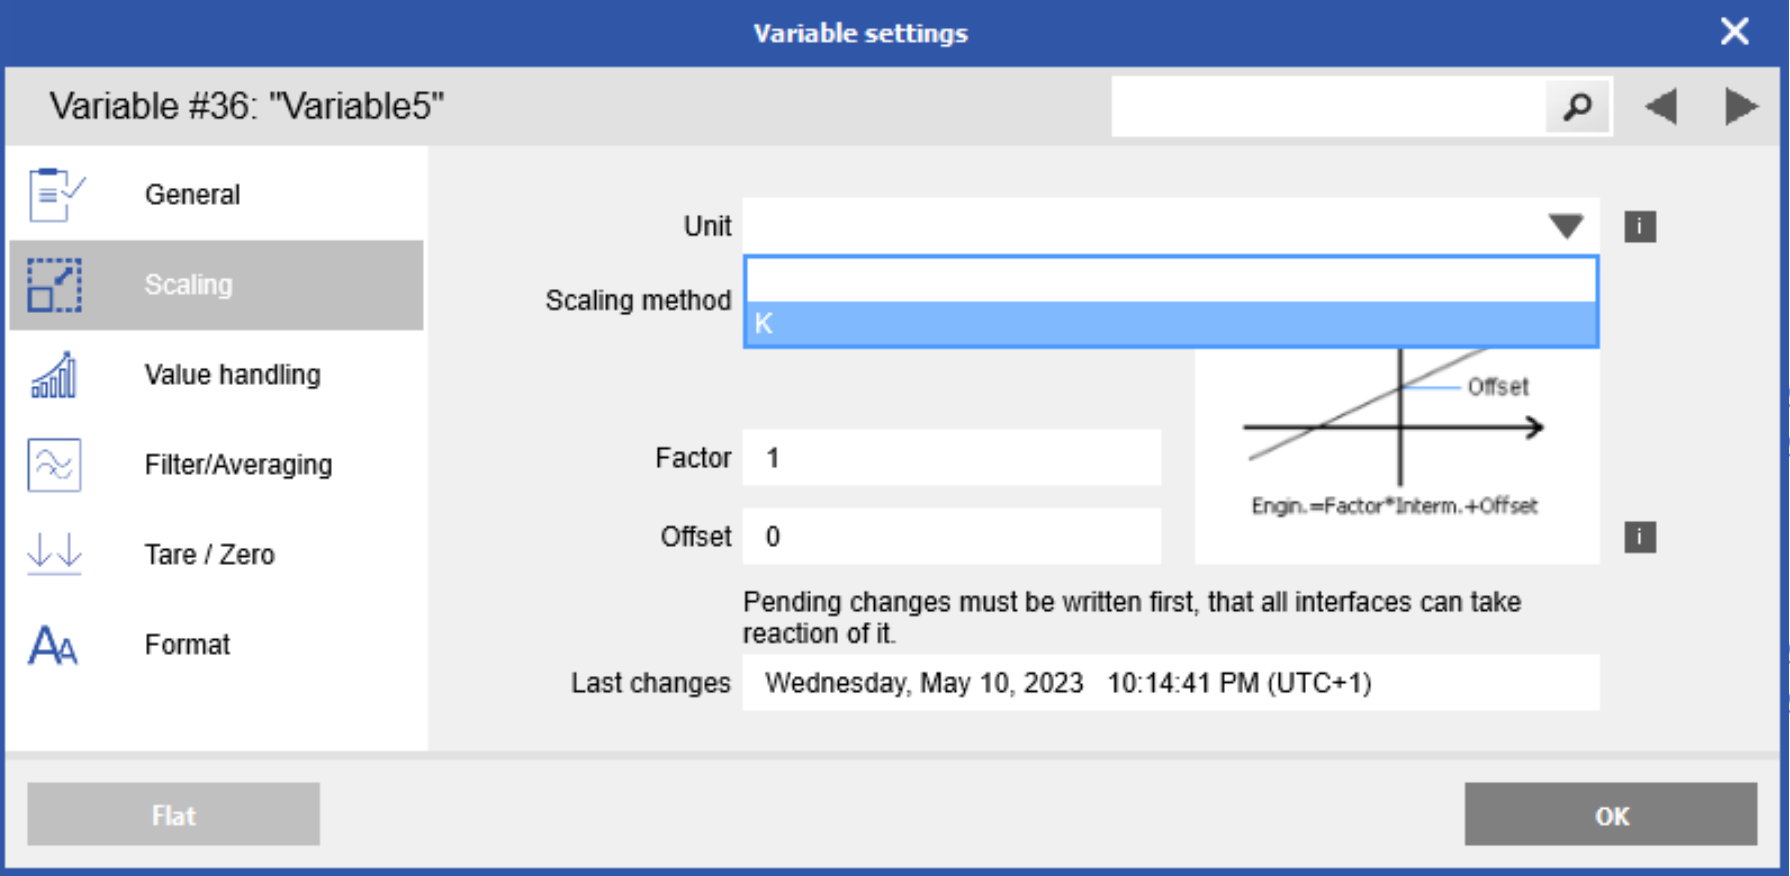
Select the Unit from the drop-down list in the Scaling section. There is no need to change the factor and offset, as scaling is based on the linearization defined for the sensor type.
-
Click OK and write the updates to the controller.