Purpose
An average Gantner project can consist of a handful of channels to a couple of hundred channels within a single controller. It is easy to name a handful of channels manually, but it can be tedious to name hundreds of channels manually. A project loaded into a Gantner controller (i.e., Q.gate, Q.station), especially if PAC functionality is enabled, must have variables with unique names.
GI.bench Procedure
- Open a GI.bench project or read the connected controller
- Right-click anywhere in the project window and select Edit Varnames (you can also Ctrl+click/Shift+click specific variables and then right-click > Edit varnames to highlight desired channels in the next window)
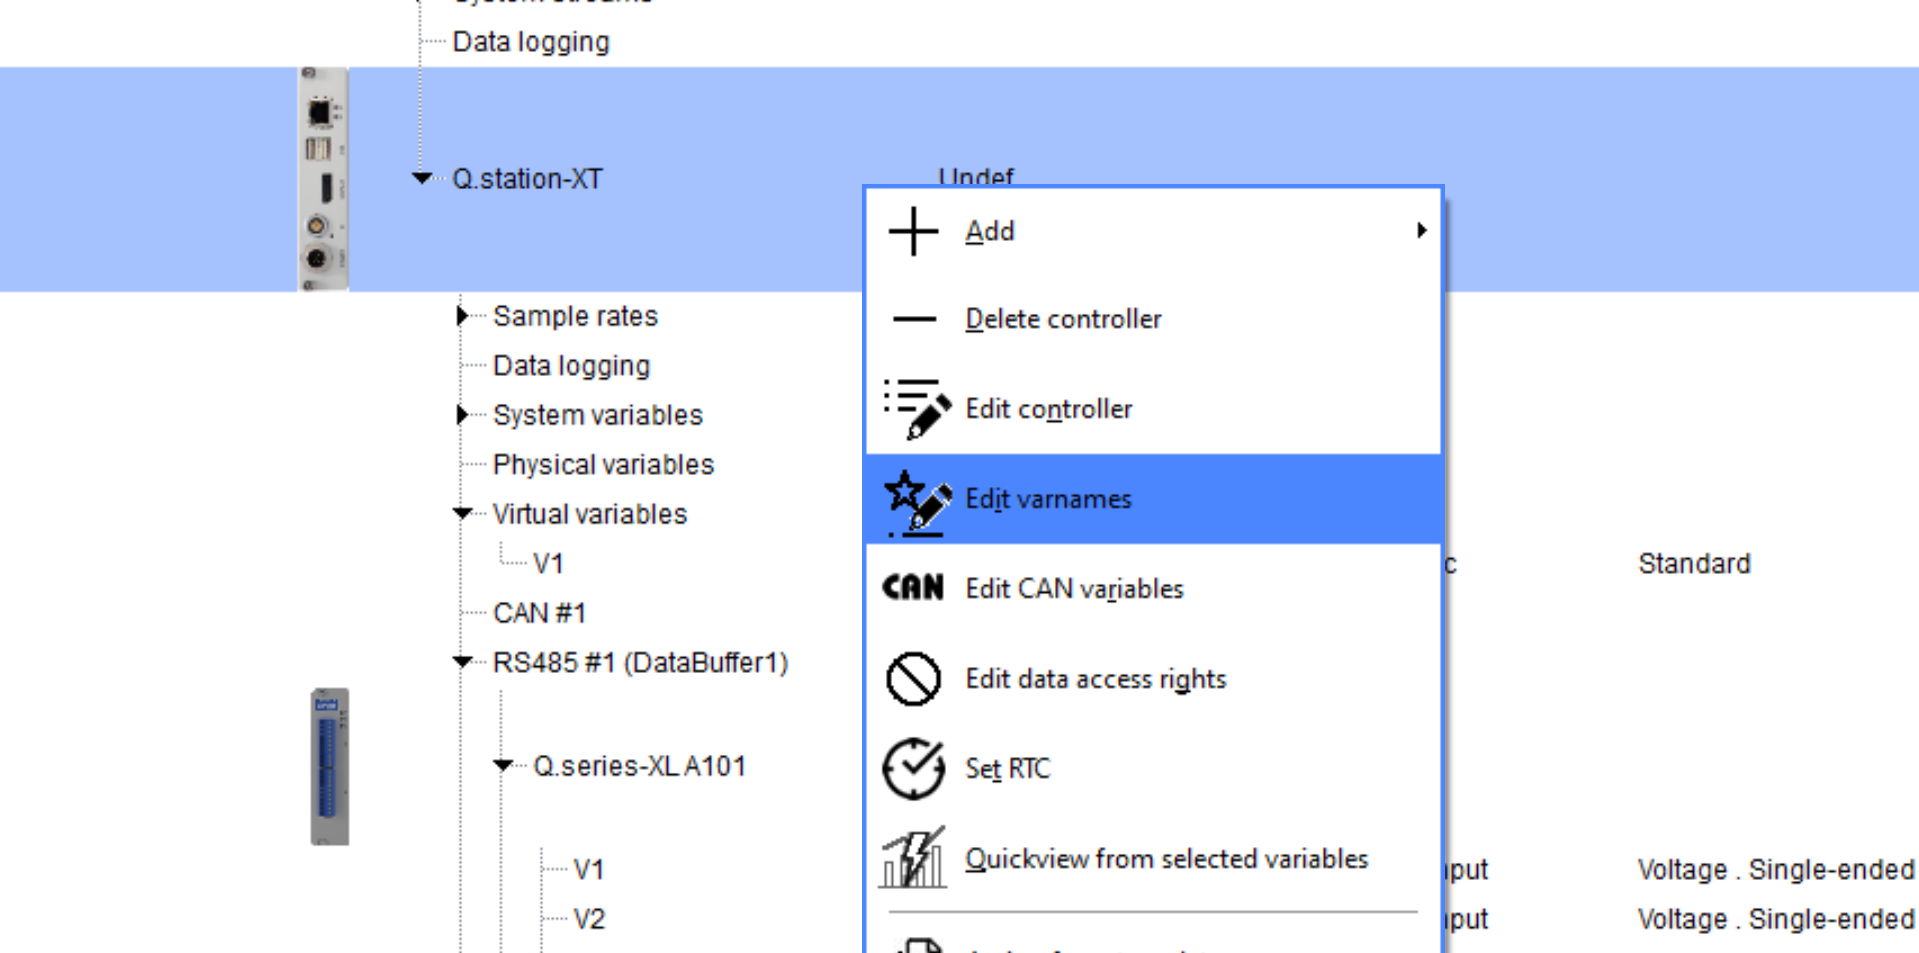
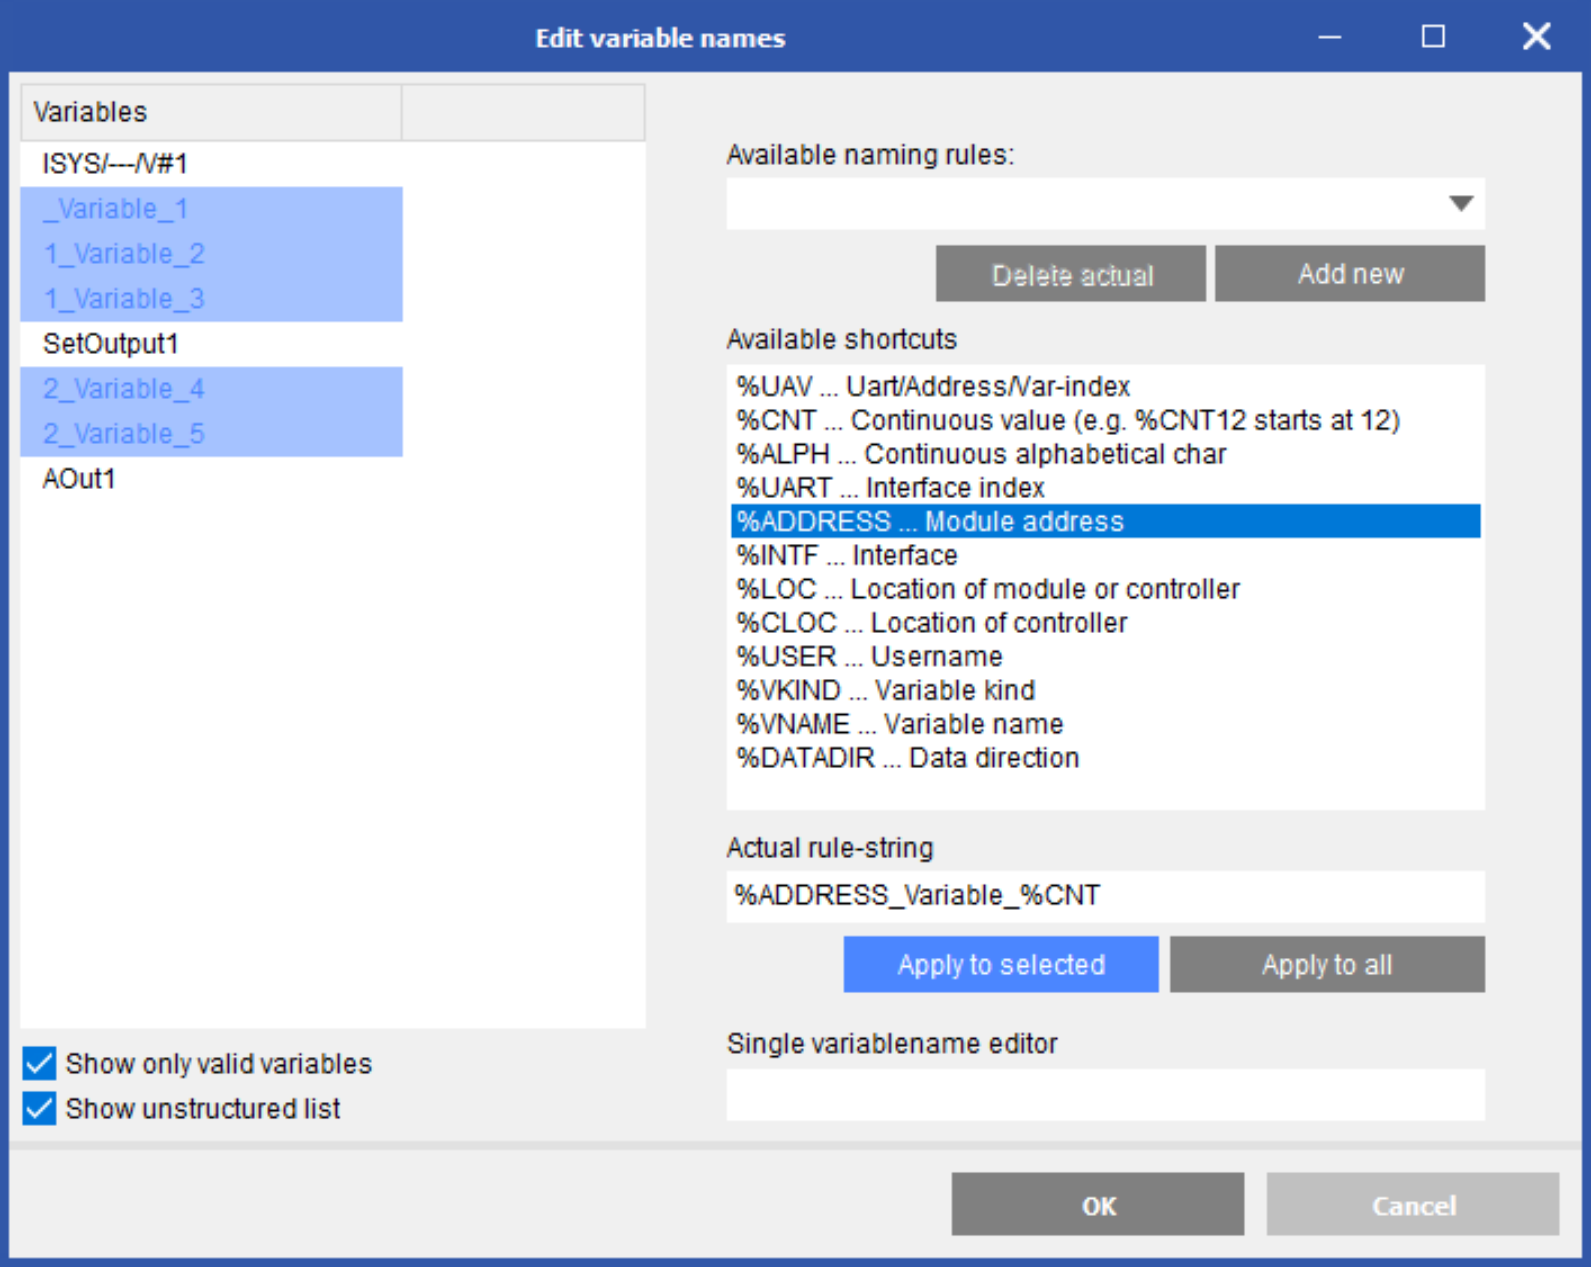
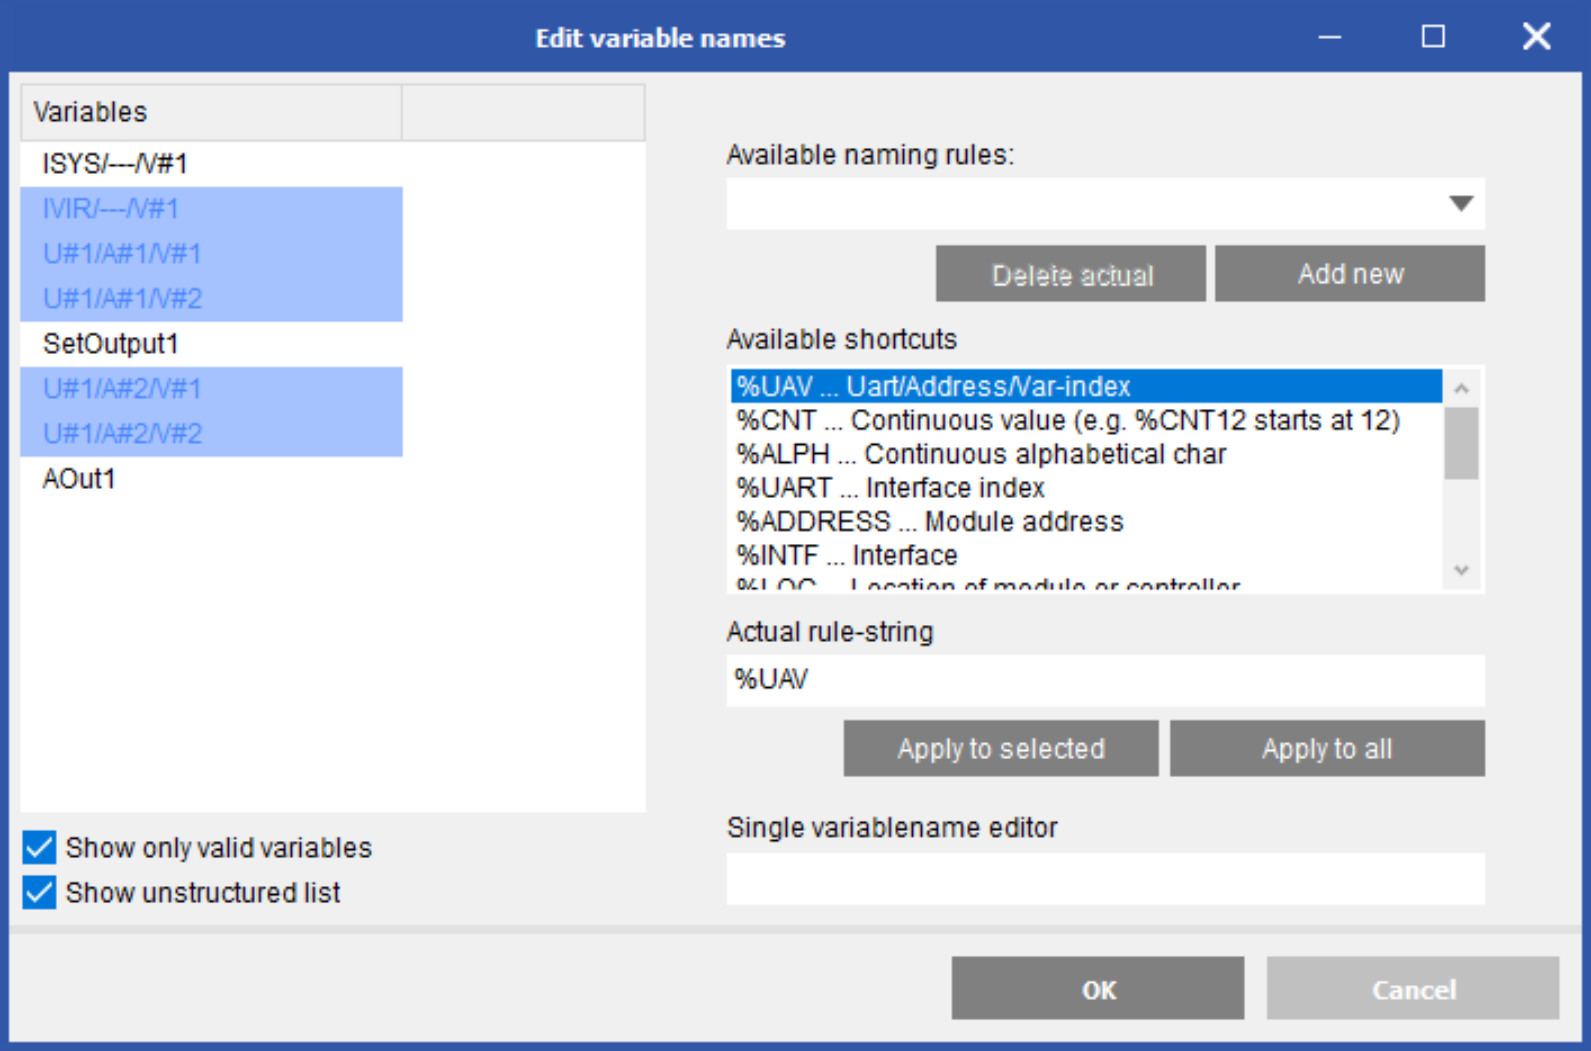
- Make sure desired channels are highlighted in the variables section
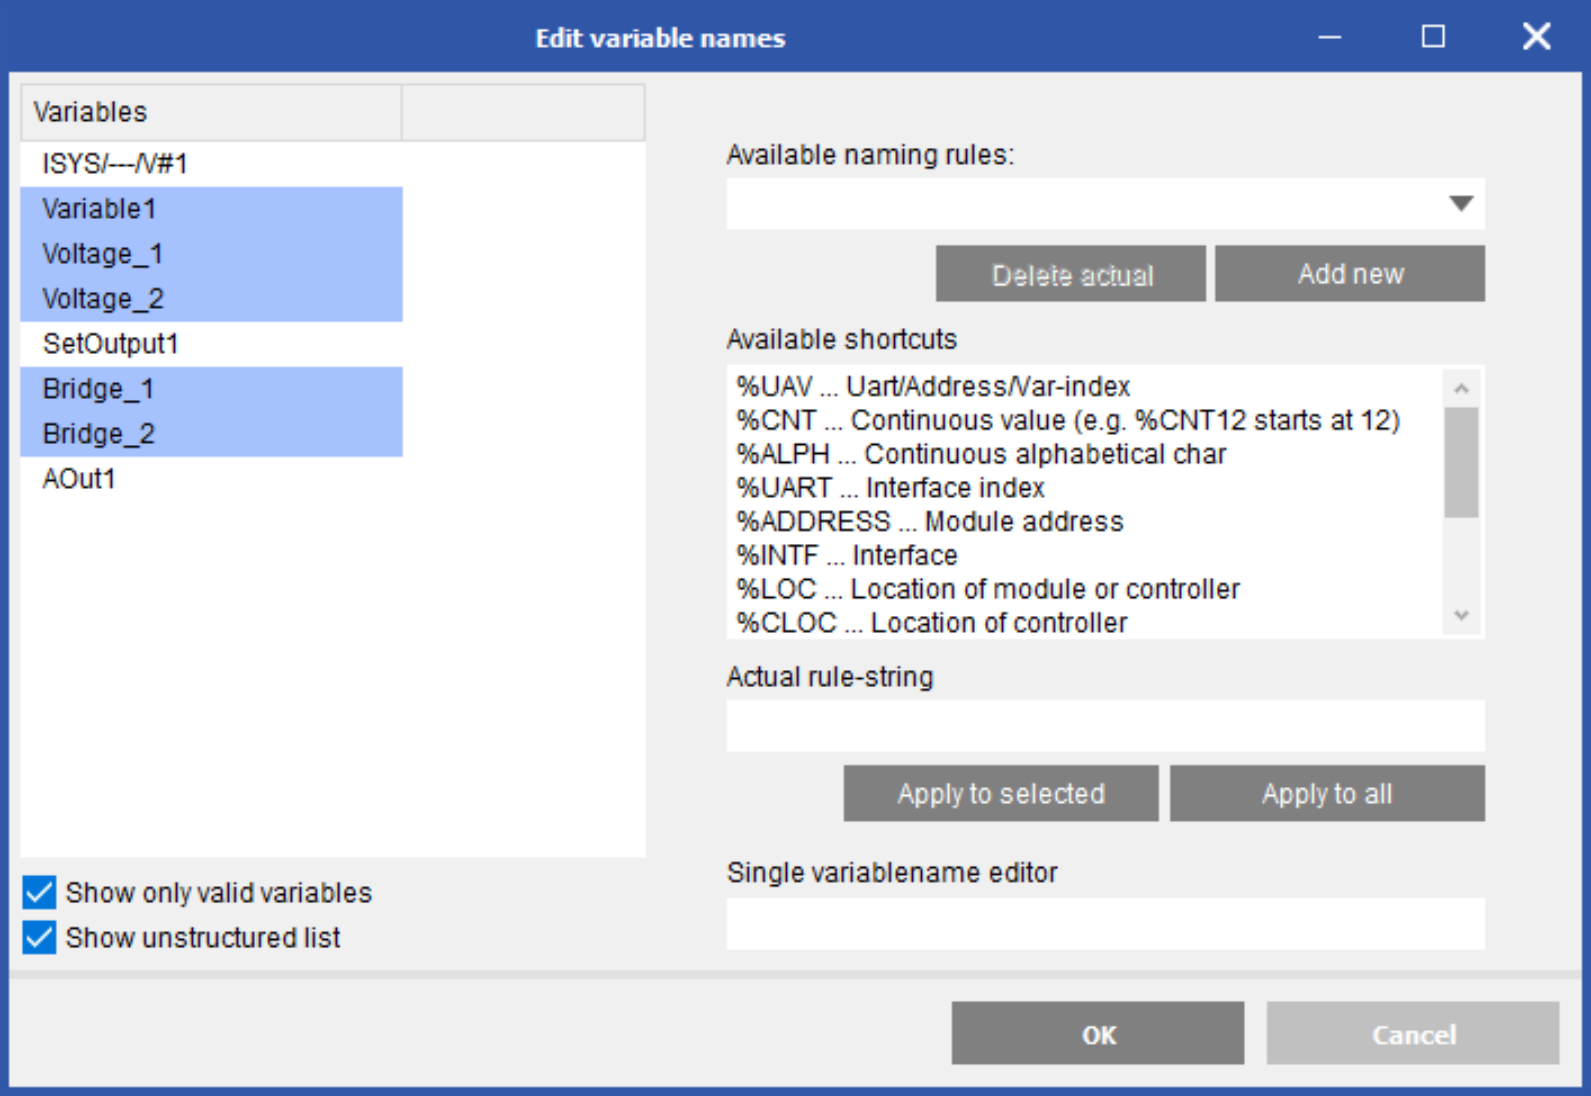
- Use available shortcuts to create a naming rule to be applied to selected or all variables. You can mix static naming with the shortcuts.
- Click OK to save changes. Click Write to implement changes to the hardware.
test.commander Procedure
- Set up the hardware in a typical manner.
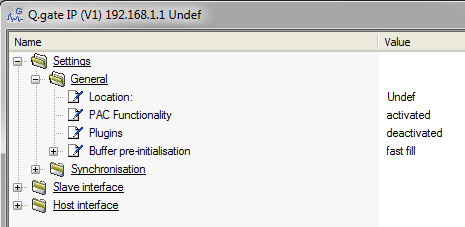
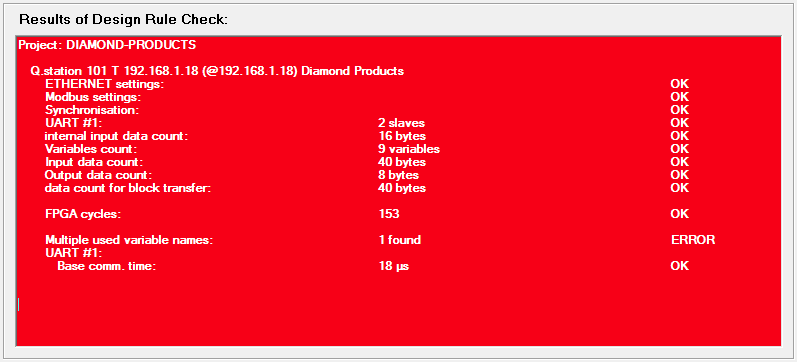
- A Q.gate with PAC Functionality activated, and all Q.stations must have a unique name for all channels.
- A project with non-unique names will not be able to update the controller. A RED screen will be displayed in the Design Rule Check window.
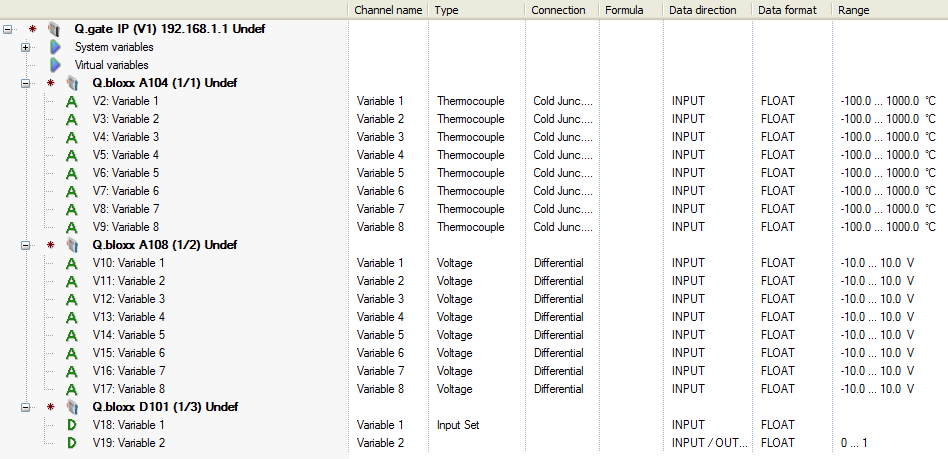
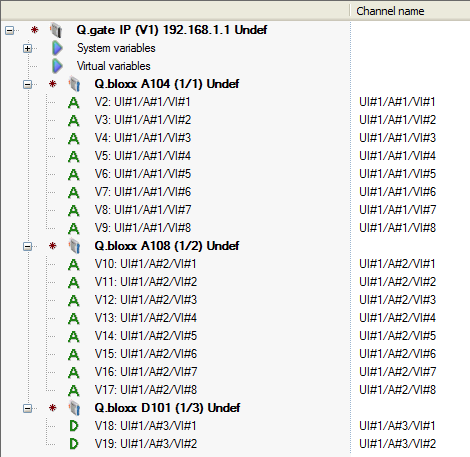
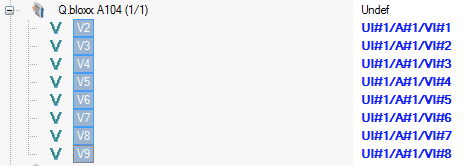
- By default, the slave modules have standard configuration is loaded for the first time, as shown in the image below. Notice that the variables do not have unique names within the entire project.
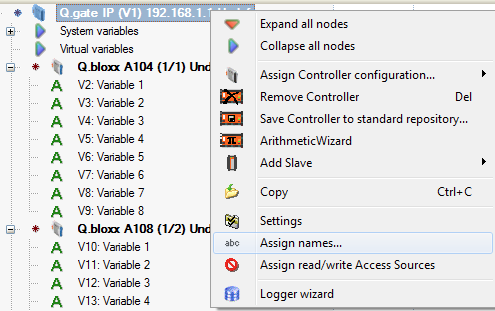
- Right-click on the controller and select Assign names:
- The Assign names window will open. Right-click on the controller to bring up the format selection window:
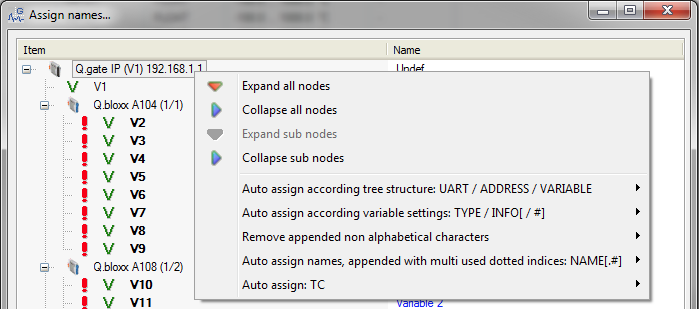
- There are several options on how to name all the channels automatically. The simplest option is to name according to tree structure: UART / ADDRESS / VARIABLE
- The Design Rule Check will now display a white window, meaning this project will load correctly into the controller.

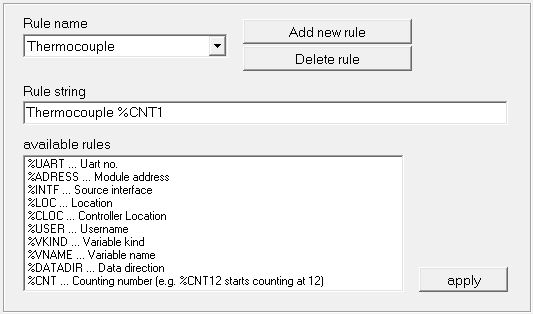
- It is also possible to customize the variable’s name rule. Select Extras > Settings. With the Software settings window open, select the Var-names tab.
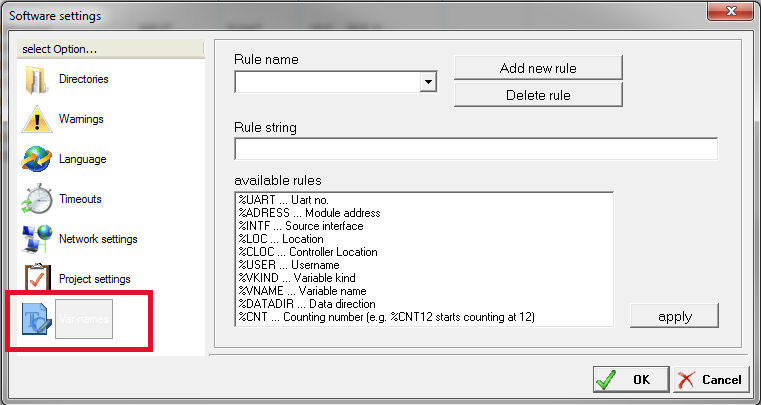
- Select the Add new rule button. Name the rule (for this example, we will name the thermocouple channels).
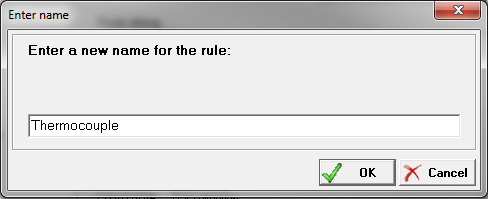
- Now create the string for the rule. Use the available rules with a custom test to create the rule. For this example, we will use “Thermocouple %CNT1”.
- Go to the Assign names window. Highlight the variables to name (for this example, select the channels in the A104).
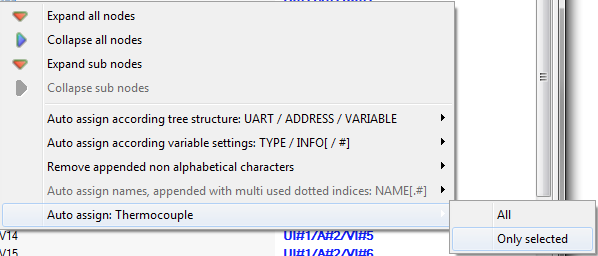
- Right-click on the variables and select the rule that was created above. Choose the only selected option.
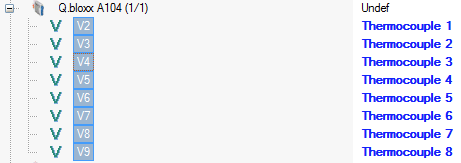
- The selected channels will utilize the rule:
- Repeat this process for other variable types. Select File > Calculate Statistics > Check to verify that the project passes before loading to the controller.